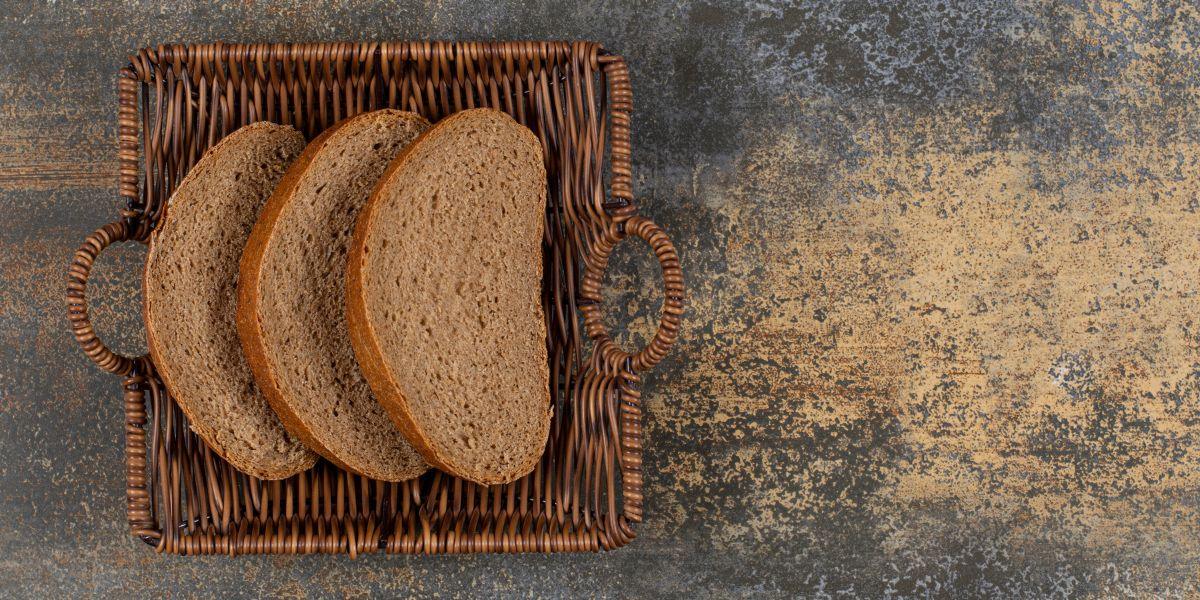
There’s something magical about pulling a golden, crusty loaf of homemade bread from your oven—the crackling sound as it cools, the intoxicating aroma filling your kitchen, and that first warm slice slathered with butter. If you’ve been intimidated by bread baking, this rustic whole wheat bread recipe is your gateway to becoming a confident home baker.
Related Recipe: Whole Wheat Bread Machine Recipe
This isn’t your grandmother’s labor-intensive bread recipe. There’s no kneading, no special equipment beyond a Dutch oven, and absolutely no bread-making experience required. I developed this recipe after years of overcomplicating bread baking, and I’ve finally cracked the code: incredible artisan-style whole wheat bread with just five pantry staples and about five minutes of hands-on work.
What makes this recipe truly special is its foolproof nature. The long, slow rise (which happens while you sleep or go about your day) develops deep, complex flavors that rival any bakery loaf. The whole wheat flour adds nutty richness and wholesome nutrition, while the Dutch oven creates the perfect steam environment for that coveted crispy, crackly crust. Whether you’re a complete beginner or a seasoned baker looking for a reliable everyday loaf, this recipe delivers bakery-quality results every single time.
Perfect for busy families, health-conscious eaters, and anyone who wants fresh bread without the fuss. Trust me—if I can make this bread, anyone can.
Related Recipe: Yummy Whole Wheat Sourdough Bread
Recipe Details for Rustic Whole Wheat Bread Recipe
Prep Time: 10 minutes
Rise Time: 12-18 hours (inactive)
Cook Time: 45 minutes
Total Time: 13-19 hours
Yield: 1 large loaf (12-14 slices)
Difficulty Level: Easy (Beginner-Friendly)
Related Recipe: Honey Wheat Bread Recipe
Ingredients for Rustic Whole Wheat Bread Recipe
For the Bread Dough:
- 2 cups whole wheat flour (I love King Arthur or Bob’s Red Mill)
- 1½ cups all-purpose flour or bread flour
- 2 teaspoons fine sea salt
- ¼ teaspoon instant yeast (yes, just ¼ teaspoon!)
- 1½ cups room temperature water
- 1 tablespoon honey (optional, for deeper flavor and softer crumb)
For Baking:
- 2 tablespoons cornmeal or flour (for dusting)
- Extra flour for shaping
Related Recipe: Best Whole Wheat Bread Machine Recipe
Step-by-Step Instructions for Rustic Whole Wheat Bread Recipe
Step 1: Mix the Dough (5 minutes)
In a large mixing bowl, whisk together the whole wheat flour, all-purpose flour, salt, and instant yeast until evenly combined. Create a well in the center and pour in the room temperature water (and honey, if using). Using a wooden spoon or Danish dough whisk, stir until no dry flour remains and you have a shaggy, sticky dough. Don’t worry about smoothness—this rustic dough should look rough. The consistency will be wetter than traditional bread dough; this is exactly what you want.
Step 2: First Rise (12-18 hours)
Cover the bowl tightly with plastic wrap or a damp dish towel. Let the dough rest at room temperature (68-72°F) for 12-18 hours. The longer rise develops more complex flavors. You’ll know it’s ready when the surface is dotted with bubbles and the dough has at least doubled in size. During colder months, you can place the bowl in your oven with the light on for extra warmth.
Step 3: Shape the Dough (2 minutes)
Generously flour a clean work surface. The dough will be quite sticky—resist the urge to add too much flour. Gently scrape the dough onto the floured surface using a bowl scraper or spatula. With floured hands, fold the dough over itself 2-3 times from the edges toward the center, creating a rough ball shape. Don’t knead; just fold gently to create some surface tension.
Step 4: Second Rise (1-2 hours)
Generously dust a piece of parchment paper with cornmeal or flour. Place the shaped dough seam-side down on the parchment paper. Cover loosely with a clean dish towel and let rise for 1-2 hours, until puffy and nearly doubled. The dough should spring back slowly when gently poked.
Step 5: Preheat the Dutch Oven (30 minutes)
About 30 minutes before baking, place your Dutch oven (with lid) in the oven and preheat to 450°F (230°C). This step is crucial—the screaming hot pot creates the steam needed for that signature crusty exterior.
Step 6: Score and Bake (45 minutes)
Carefully remove the hot Dutch oven (use oven mitts—it’s extremely hot!). Using the parchment paper as a sling, carefully lower the dough into the pot. Cover with the lid and bake for 30 minutes. Remove the lid and continue baking for 12-15 minutes until the crust is deep golden brown and the internal temperature reaches 205-210°F.
Step 7: Cool Completely
Lift the bread out using the parchment paper and transfer to a wire cooling rack. Let it cool for at least 30 minutes before slicing. I know this is torture, but cutting too early releases steam and makes the interior gummy. The crust will crackle beautifully as it cools—that’s the sound of success!
Related Guide: Bread Flour vs All-Purpose Flour
Recipe Notes & Pro Tips for Rustic Whole Wheat Bread Recipe
Flour Matters: I highly recommend King Arthur Whole Wheat Flour or Bob’s Red Mill Stone Ground Whole Wheat—they create the most flavorful loaf. You can use 100% whole wheat, but the bread will be denser. The blend of whole wheat and all-purpose/bread flour gives you nutrition with a lighter, airier crumb.
Yeast Quantity: Yes, only ¼ teaspoon! The long fermentation time means you need very little yeast. I use Fleischmann’s or Red Star instant yeast. More yeast = faster rise, but less flavor development.
Water Temperature: Room temperature (68-75°F) is key. Too cold and the yeast won’t activate; too hot and you’ll kill it.
Dutch Oven Alternatives: A Lodge cast iron combo cooker, Le Creuset Dutch oven, or any heavy oven-safe pot with a lid works great. Even a covered roasting pan will do in a pinch. The key is trapping steam during the first 30 minutes of baking.
Timing Flexibility: The beauty of this recipe is its flexibility. The first rise can go anywhere from 12-24 hours (refrigerate if longer than 18 hours). The second rise can be 1-3 hours. Bread baking is forgiving!
Scoring Tips: Make 2-3 shallow slashes (about ¼-inch deep) with a sharp serrated knife, razor blade, or bread lame just before baking. This allows the bread to expand properly and creates that classic artisan bakery look.
Related Guide: Authentic Rougamo Bread Recipe
Ingredient Substitutions & Variations
Flour Swaps:
- Replace 1 cup whole wheat with white whole wheat for a milder flavor
- Use 100% whole wheat for heartier, denser bread (add 2-3 tablespoons more water)
- Substitute up to ½ cup flour with rye, spelt, or oat flour for unique flavors
Flavor Boosters:
- Add 2 tablespoons of seeds (sunflower, pumpkin, flax, sesame) to the dough
- Mix in 1 tablespoon dried herbs (rosemary, thyme, oregano)
- Fold in ¼ cup chopped olives and sun-dried tomatoes for Mediterranean flair
- Add 2 teaspoons of caraway seeds for a rye-style flavor
- Incorporate ½ cup dried cranberries and ¼ cup walnuts for a sweet variation
Honey-Free Option: Simply omit the honey. It adds subtle sweetness and helps with browning, but the bread is excellent without it.
Vegan: This recipe is naturally vegan (use the honey-free option).
Related Guide: King Arthur Gluten-Free Sourdough Bread Recipe
Storage Instructions & Shelf Life
Room Temperature: Store cooled bread in a paper bag or bread box for 2-3 days. The crust will soften slightly, but it remains delicious. Never store in plastic at room temperature, as this can make the crust soggy.
Freezing: This bread freezes beautifully! Once completely cooled, wrap tightly in plastic wrap, then aluminum foil. Freeze for up to 3 months. Thaw at room temperature for 2-3 hours, or slice the frozen bread and toast it directly.
Refreshing Stale Bread: Sprinkle the loaf lightly with water and warm in a 350°F oven for 8-10 minutes to restore crustiness.
Slicing Tip: A serrated bread knife works best. Store cut-side down to prevent the interior from drying out.
Serving Suggestions & Pairings
This versatile rustic whole wheat bread shines in countless ways:
For Breakfast:
- Toasted with butter and jam (my kids love Smucker’s strawberry!)
- As the base for avocado toast with Trader Joe’s Everything But the Bagel seasoning
- French toast with a nutty, hearty twist—perfect for Sunday brunch
- Alongside scrambled eggs and crispy bacon
For Lunch:
- The ultimate grilled cheese (use sharp cheddar—trust me!)
- Hearty deli sandwiches with turkey, Swiss, lettuce, and tomato
- Dipped in Campbell’s tomato soup or homemade minestrone
- Croutons for Caesar salad (cube, toss with olive oil and garlic powder, bake until crispy)
For Dinner:
- Alongside spaghetti with marinara sauce
- Torn into chunks for Italian bread salad (panzanella)
- Slathered with garlic butter as a side for steak night
- As a bruschetta base with diced tomatoes, basil, and balsamic glaze
Gourmet Touches:
- Served with olive oil, balsamic vinegar, and herb dip
- Paired with artisan cheeses and charcuterie
- As crostini topped with ricotta and honey
- With hearty soups like French onion or lentil
Troubleshooting Common Issues
Problem: Dense, Heavy Bread
- Solution: Your dough is likely under-fermented. Ensure the first rise is 12-18 hours and the dough has truly doubled. In cold weather, find a warmer spot (oven with light on).
Problem: Flat Bread That Doesn’t Rise
- Solution: Check your yeast expiration date. Instant yeast should be fresh (within 6 months of opening). Also ensure water isn’t too hot, which kills yeast.
Problem: Pale, Soft Crust
- Solution: Your Dutch oven wasn’t hot enough. Always preheat for the full 30 minutes at 450°F. Also, removing the lid for the final 12-15 minutes is crucial for browning.
Problem: Burnt Bottom
- Solution: Place a cookie sheet or pizza stone on the rack below the Dutch oven to shield the bottom from direct heat. Some ovens (especially older electric models) run hot on the bottom element.
Problem: Gummy Interior
- Solution: The bread wasn’t baked long enough. Always bake until the internal temperature reaches 205-210°F. Also, wait until fully cooled before slicing.
Problem: Dough Too Sticky to Handle
- Solution: This is totally normal for no-knead dough! Use plenty of flour on your hands and work surface during shaping. A bench scraper (or even a sturdy plastic spatula) helps tremendously. Resist adding flour to the dough itself—it should stay wet and sticky.
Nutritional Information
Per Slice (1/12 of loaf):
- Calories: 135
- Total Fat: 0.8g
- Sodium: 295mg
- Total Carbohydrates: 28g
- Dietary Fiber: 3g
- Protein: 5g
- Sugar: 1g
Note: Nutritional values are approximate and based on the recipe as written. Values will vary based on ingredient brands and modifications.
Frequently Asked Questions
Q: Can I make this bread without a Dutch oven?
A: Yes! Use any heavy, oven-safe pot with a lid (cast iron, ceramic, or enamel-coated). Alternatively, bake the bread on a baking stone or sheet and create steam by placing a metal pan with boiling water on the bottom rack. The crust won’t be quite as crispy, but it still works well.
Q: Why does my bread need such a long rise time?
A: The minimal yeast and long fermentation develop complex flavors you simply can’t achieve with a quick rise. This method also makes the bread more digestible and gives it a better texture. The beauty is that most of this time is hands-off—the bread does the work while you sleep or go about your day!
Q: Can I speed up the rise time?
A: While I don’t recommend it for flavor reasons, you can reduce the first rise to 8 hours by using ½ teaspoon yeast instead of ¼ teaspoon. Place the bowl in a warm spot (75-80°F). However, you’ll sacrifice some of that deep, complex flavor.
Q: What’s the difference between this and sourdough?
A: Sourdough uses wild yeast (starter) and has a tangy flavor from lactic acid fermentation. This recipe uses commercial yeast for reliability and a milder, wheaty flavor. It’s much easier for beginners and doesn’t require maintaining a starter.
Q: Can I use active dry yeast instead of instant yeast?
A: Yes! Active dry yeast (like Fleischmann’s in the glass jar) works fine. Use the same amount (¼ teaspoon) and dissolve it in the water for 5 minutes before adding to the flour. Instant yeast (also called “bread machine yeast” or “rapid rise”) can be mixed directly with dry ingredients, which is why I prefer it for this recipe.
Related Recipes:
 Korean Retinol Tea Recipe: The Complete Guide to This Viral Anti-Aging Beauty Drink
 Korean Retinol Tea: Everything You Need to Know About This K-Beauty Wellness Trend
 Easy Homemade Whole Wheat Bread Recipe – Soft & Yummy Made at Home
 Easy Honey Wheat Bread Recipe: The Best Homemade Bread for Kids
 The BEST Whole Wheat Bread Machine Recipe (Super Easy!)
 How to Make Yummy Whole Wheat Sourdough Bread (It’s Easier Than You Think!)
 Soft and Yummy Whole Wheat Sandwich Bread Recipe (Must Try!)
 Korean Retinol Tea Loophole: The Viral TikTok Secret to Glowing Skin Without Harsh Retinol
 Easy Authentic Rougamo Bread Recipe: The Crispy Chinese Flatbread 2025 Recipe
 Bread Flour vs All-Purpose Flour: What’s the Difference?
 King Arthur Gluten-Free Sourdough Bread Recipe