Quick Summary
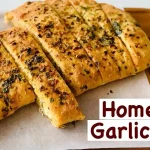
Want fresh, warm garlic bread that tastes 100 times better than frozen? This easy homemade garlic bread from scratch uses simple all-purpose flour and pantry basics to create restaurant-quality results in under two hours. You’ll get a soft, tender interior with a crispy, golden crust loaded with real garlic butter—and yes, you can absolutely freeze it for later!
Related Recipe: Garlic Bread Recipe from Scratch
Introduction: Your Kitchen is About to Smell Incredible
There’s a moment in baking that I absolutely live for. It’s when you pull something warm from the oven and your entire kitchen fills with that incredible smell. Making garlic bread from scratch at home gives you exactly that moment—every single time.
I remember the first time I made homemade garlic bread. I was intimidated. I thought bread-making required special skills, fancy equipment, and ingredients I couldn’t pronounce. But then I realized: I was overthinking it. Garlic bread is one of the easiest and most forgiving breads you can make at home.
That first loaf came out golden, buttery, and so good that my family asked me to make it again the next week. Then the week after that. Now, making garlic bread from scratch is something I do regularly because it’s genuinely easier than running to the store—and it tastes infinitely better.
Why Homemade Beats Store-Bought Every Single Time
Store-bought frozen garlic bread has a problem: it sits in a freezer for months. That time creates freezer burn, weird textures, and artificial flavoring that just doesn’t compare to the real thing. When you make garlic bread at home, you control every ingredient. You use real butter (not that margarine-butter blend), actual fresh garlic (not powder), and fresh herbs.
The taste difference is night and day. Your homemade version will have a real, honest flavor that makes people actually excited to eat the side dish instead of just tolerating it.
Why All-Purpose Flour is the Best Choice for Garlic Bread
Let me be straight with you: flour matters in baking. Different types of flour have different amounts of protein, and that protein affects how your bread turns out.
All-purpose flour (which is what we’re using) contains about 10-12% protein. This is the perfect sweet spot for garlic bread:
- Enough protein to develop gluten (the network that makes bread stretchy and gives it structure)
- Not too much protein (which would make your bread tough and chewy like bagels)
- Just right to create that tender crumb that’s still sturdy enough to hold garlic butter without falling apart
Compare this to other flours:
Bread Flour has 12-14% protein and makes garlic bread too chewy and dense. It’s better for sandwich loaves where you want that chew.
Cake Flour has only 7-9% protein and would make your garlic bread crumbly and dry. It’s meant for soft, tender cakes—not bread.
All-Purpose Flour gives you the exact texture you want: soft on the inside, sturdy on the outside, with that perfect golden color when baked.
This is why all-purpose flour is the standard choice for home bakers. It works beautifully for garlic bread, pizza dough, rolls, sandwich bread, and most everyday baking projects. One bag of all-purpose flour can handle almost everything in your kitchen.
The Complete Ingredient List: What You Actually Need
Before you get started, let’s talk about the ingredients. This recipe uses things you probably already have.
For the Dough (Makes 1 large loaf):
3 cups all-purpose flour – This is your base. Use the scoop-and-level method: scoop flour into a measuring cup, then level it off with a knife. Don’t pack the flour or you’ll use too much.
2½ teaspoons instant yeast – This is one standard packet of yeast. Instant yeast (also called bread machine yeast) is smaller granules than active dry yeast, so they dissolve faster. Make sure your yeast isn’t expired. Old yeast won’t rise your bread properly.
1 tablespoon sugar – This feeds the yeast and helps activate it. The sugar also adds a tiny bit of sweetness to balance the salt and garlic.
1½ teaspoons salt – Salt flavors the dough and controls yeast activity (too much slows rising, too little speeds it up). Don’t skip this—it’s essential.
3 tablespoons butter, softened – This creates a tender crumb and adds richness. Softening it first means it mixes in smoothly without tearing the dough.
¾ cup warm milk – Milk creates a softer, more tender crumb than water alone. It should feel warm to your touch (about 110°F). Not hot—hot liquid kills yeast.
¼ cup warm water – Combined with the milk, this gives you the right moisture level for a soft but not sticky dough.
For the Garlic Butter Topping:
4 tablespoons (½ cup) butter, softened – This is what makes garlic bread actually delicious. Softened butter spreads evenly without tearing your shaped dough. If your butter is too hard, it will poke holes. Too soft, and it will melt and make things messy.
4 cloves fresh garlic, minced very fine – Fresh garlic is non-negotiable. Pre-minced garlic from a jar has a different flavor (and sometimes contains preservatives). Mincing it yourself takes 2 minutes and makes a huge difference.
2 tablespoons fresh parsley, chopped fine – Fresh parsley adds color, freshness, and flavor. If you don’t have fresh parsley, dried parsley works (use 2 teaspoons instead).
¼ teaspoon Italian seasoning – This is your herb blend: usually oregano, basil, and thyme mixed together. You can make your own blend or use the packaged kind.
¼ teaspoon salt – A small pinch of salt in the butter topping enhances flavor. Don’t skip this—it’s what makes the butter topping taste restaurant-quality.
¼ teaspoon Parmesan cheese, finely grated (optional) – This adds a salty, nutty, umami-rich layer to the topping. It’s not essential, but it’s the difference between good garlic bread and “wow, this is incredible” garlic bread.
Shopping Tips:
- Buy fresh garlic when you see it. If it’s starting to sprout, that’s actually fine—just cut off the green sprout. Fresh garlic keeps for weeks in a cool, dark place.
- Check your yeast expiration date. Yeast dies over time, and old yeast won’t rise your bread.
- Unsalted butter is best because it gives you control over the salt level in your recipe.
Complete Step-by-Step Instructions: From Flour to Fresh Bread
Part 1: Making and Kneading the Dough (15 minutes active time)
Step 1: Activate Your Yeast
Pour ¼ cup warm water into a small bowl. Add 1 tablespoon sugar and sprinkle 2½ teaspoons instant yeast over the top. Stir gently.
Wait 5 minutes. After 5 minutes, you should see foam or bubbles on top of the water. This foam means your yeast is alive, active, and ready to help your bread rise. If you don’t see any foam, your yeast is dead and you need to start over with fresh yeast.
Why this matters: This step is called “blooming” the yeast. It proves your yeast is alive before you add it to all your other ingredients.
Step 2: Mix Your Dry Ingredients
In a large mixing bowl, add 3 cups all-purpose flour and 1½ teaspoons salt. Whisk them together for about 30 seconds. This distributes the salt evenly throughout the flour.
Make a small well (like a volcano shape) in the center of your flour.
Step 3: Combine Everything Together
Pour your foamy yeast mixture into the well you just made. Add ¾ cup warm milk and 3 tablespoons softened butter into the same well.
Using a wooden spoon or sturdy spatula, stir from the center, pulling flour from the sides into the wet mixture. Keep stirring until everything is combined and you have one shaggy, messy-looking ball of dough.
Don’t worry if it looks rough and doesn’t look like smooth dough yet. That’s completely normal.
Step 4: Time to Knead (This is Where the Magic Happens)
Transfer your shaggy dough to a lightly floured work surface (your countertop or a cutting board works perfectly).
If you’re kneading by hand:
- Push the dough away from you with the heel of your hand
- Fold it back toward you
- Turn it a quarter turn and repeat
- Continue this push-fold-turn motion for 8-10 minutes
If you’re using a stand mixer:
- Use the dough hook attachment
- Mix on medium speed for 5-6 minutes
- The dough should pull away from the sides of the bowl when done
How to know you’re done kneading: The dough should be smooth, elastic, and slightly sticky to the touch. When you poke it, it should spring back slowly (not immediately, and not too slowly). It’s like touching a pillow—soft but with resistance.
Why kneading matters: Kneading develops gluten, which is the protein network that traps air bubbles and makes your bread light and fluffy instead of dense and heavy.
Part 2: First Rise—Building Flavor (45-60 minutes)
Step 5: Set Up for Rising
Lightly oil a large mixing bowl (or spray it with cooking spray). Place your kneaded dough in the oiled bowl and turn it to coat all sides lightly with oil. This prevents a crust from forming on top of the dough.
Cover the bowl loosely with a damp kitchen towel or plastic wrap. You want it covered (to keep the dough from drying out) but not airtight (the dough needs a tiny bit of air circulation).
Step 6: Find a Warm Place to Rise
Place your covered bowl in a warm spot. Here are some good options:
- Turn on your oven to 200°F, then turn it off. Let it cool for 2 minutes, then place the bowl inside. The residual heat creates the perfect warm environment.
- Place it in a sunny windowsill (warm but not too hot)
- Use your microwave: Turn on the light, but don’t run the microwave. The warmth from the light bulb creates a warm spot.
- Use a cooler: Fill a larger cooler with warm (not hot) water and nestle your bowl inside.
Step 7: Wait for Doubling
Let the dough rise for 45-60 minutes. You’ll know it’s done when it has roughly doubled in size. You can tell by looking at it, or you can use the “poke test”: gently poke the dough with your finger. If the indent stays (it doesn’t spring back), the dough is ready. If it springs back immediately, it needs more time.
Why this first rise matters: During this rise, yeast cells are multiplying and eating the flour. As they eat, they release carbon dioxide (which makes bubbles) and other compounds that create real bread flavor. This is why rushed bread tastes bland. Time = flavor.
Part 3: Shaping and Second Rise (30-40 minutes)
Step 8: Shape Your Loaf
Turn your risen dough out onto a lightly floured surface. Gently press it down to release some of the large air bubbles, but don’t knead it or punch it aggressively. You want to keep the air bubbles that the yeast created.
Shape it into either:
- A round ball (for a round garlic bread loaf)
- A long oval/batard (for a more traditional bread shape)
- A long, thin baguette (if you likea more crust-to-crumb ratio)
The shape doesn’t matter as much as being gentle. Handle it like you’re handling something delicate.
Step 9: Place in Baking Pan
Grease a 9-inch round cake pan, or a 9×5-inch loaf pan, or a large baking sheet with butter or cooking spray.
Place your shaped dough in the pan. For a round pan, it should fit with a tiny bit of room around the edges. For a loaf pan, the dough should roughly fill the pan halfway.
Step 10: Second Rise (Final Proof)
Cover loosely with a damp towel. Let rise in your warm spot for 20-30 minutes. This second rise should be shorter than the first. After this rise, the dough should look pillowy and a bit puffed up.
Why two rises? The first rise develops flavor. The second rise gives you a lighter, airier texture in the finished bread. Two rises = better bread in every way.
Part 4: Preparing the Garlic Butter Topping (10 minutes)
Step 11: Make Your Garlic Butter Mixture
While your dough is on its second rise, prepare your topping. In a small bowl, combine:
- 4 tablespoons softened butter
- 4 cloves fresh garlic, minced very finely
- 2 tablespoons fresh parsley, chopped fine
- ¼ teaspoon Italian seasoning
- ¼ teaspoon salt
- ¼ teaspoon finely grated Parmesan (optional)
Stir everything together until well combined. The mixture should look like flavored butter paste.
Pro tip: Mince your garlic very fine. Large chunks of garlic will burn in the oven and taste bitter. Fine garlic pieces distribute evenly and roast beautifully.
Step 12: Apply the Topping
Once your dough has finished its second rise (it should look puffed and pillowy), use a pastry brush or butter knife to spread an even layer of your garlic butter mixture over the top of the loaf.
If you want to make your garlic bread extra special, you can also:
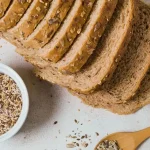
- Use a sharp knife to gently score (cut) the top in a crosshatch pattern, then brush garlic butter into those scores
- Slice the loaf partially (almost all the way through, but leave the bottom connected) and brush garlic butter between the slices
- Top with extra Parmesan cheese or fresh herbs
Part 5: Baking—Getting That Perfect Golden Crust (30-35 minutes)
Step 13: Preheat Your Oven
While the dough is finishing its second rise (during the last 5 minutes), preheat your oven to 375°F for a regular loaf, or 400°F for extra crust crispiness.
Step 14: Bake
Place your garlic bread in the preheated oven. Bake for 30-35 minutes until the top is golden brown and the loaf sounds hollow when you tap the bottom (use an oven mitt—it’s hot!).
How to check for doneness:
- Visual check: The top should be golden brown, not pale or dark
- Sound check: Turn the loaf over (carefully!) and tap the bottom. A hollow sound means it’s done
- Temperature check: Use an instant-read thermometer. The internal temperature should reach 190-200°F
- The smell test: If your kitchen smells like warm garlic bread heaven, it’s probably done!
Step 15: Cool Slightly Before Serving
Remove from the oven and let cool in the pan for 5 minutes. Then transfer to a wire cooling rack or directly to a serving plate.
The bread will continue to cook slightly, and the butter will set as it cools. Waiting just 5 minutes means the butter doesn’t squish everywhere when you slice it, but it’s still warm and delicious.
Troubleshooting: What to Do If Something Goes Wrong
Problem: Dough won’t rise at all
- Likely cause: Yeast is dead or old
- Solution: Check the expiration date on your yeast package. Get fresh yeast and start over. Also make sure your rising location is actually warm (at least 70°F)
Problem: Dough rises way too fast
- Likely cause: Your rising spot is too hot
- Solution: Find a cooler location (75-80°F is ideal, not 85°F+). Or use cold milk and water instead of warm next time
- Why it matters: Slow rise = more flavor. Too-fast rise = bland bread
Problem: Bread is dense and heavy
- Likely cause: Under-kneaded dough, too short rising time, or too much salt
- Solution: Knead for the full 8-10 minutes. Don’t rush the rises. Check your salt measurement
Problem: Bread has a weird crust and is dark brown (almost burnt)
- Likely cause: Oven temperature is too high
- Solution: Lower your oven to 350°F and bake a bit longer (40-45 minutes). If it’s already baked, it’s still edible, just slightly overbaked
Problem: Garlic butter topping burned (tastes bitter)
- Likely cause: Garlic chunks were too large and burned, or the oven was too hot
- Solution: Mince garlic very fine. Next time, lower the oven temperature by 25°F
Problem: Bread came out dry inside
- Likely cause: Baked too long, or the dough didn’t rise enough
- Solution: Pull it out earlier (check at 25 minutes), or let the dough rise longer next time
The Complete Recipe Card
Easy Homemade Garlic Bread from Scratch with All-Purpose Flour
Prep Time: 15 minutes
First Rise: 45-60 minutes
Second Rise: 20-30 minutes
Bake Time: 30-35 minutes
Total Time: 2 hours 15 minutes
Servings: 8-10 slices
Ingredients
Dough
- 3 cups all-purpose flour
- 2½ teaspoons instant yeast (1 packet)
- 1 tablespoon sugar
- 1½ teaspoons salt
- 3 tablespoons butter, softened
- ¾ cup warm milk (110°F)
- ¼ cup warm water (110°F)
Garlic Butter Topping
- 4 tablespoons (½ cup) butter, softened
- 4 cloves fresh garlic, minced very fine
- 2 tablespoons fresh parsley, chopped
- ¼ teaspoon Italian seasoning
- ¼ teaspoon salt
- ¼ teaspoon Parmesan cheese, finely grated (optional)
Instructions
- Activate yeast: Mix ¼ cup warm water, 1 tablespoon sugar, and 2½ teaspoons yeast in small bowl. Let sit 5 minutes until foamy.
- Combine dry ingredients: Whisk 3 cups flour and 1½ teaspoons salt in large bowl. Make well in center.
- Mix dough: Pour yeast mixture, ¾ cup warm milk, and 3 tablespoons softened butter into well. Stir until combined into shaggy dough.
- Knead: Transfer to a floured surface. Knead 8-10 minutes by hand (or 5-6 minutes with stand mixer on medium speed) until smooth and elastic.
- First rise: Place dough in oiled bowl, cover with damp towel, and let rise in warm place 45-60 minutes until doubled in size.
- Shape: Turn the dough onto a floured surface. Gently press to release air. Shape into round loaf.
- Second rise: Place in a greased 9-inch pan. Cover loosely and let rise 20-30 minutes until puffed.
- Make topping: Mix 4 tablespoons softened butter, 4 minced garlic cloves, 2 tablespoons parsley, ¼ teaspoon Italian seasoning, ¼ teaspoon salt, and ¼ teaspoon Parmesan in a small bowl.
- Apply topping: Brush garlic butter mixture evenly over risen dough.
- Bake: Preheat oven to 375°F. Bake 30-35 minutes until golden brown and hollow-sounding when tapped.
- Cool: Let cool in pan 5 minutes, then transfer to serving plate.
Recipe Notes & Storage
Freezing Your Garlic Bread:
Your homemade garlic bread freezes beautifully. Here are two methods:
Freeze-baked bread:
- Let cool completely to room temperature
- Slice if desired, or freeze whole
- Wrap tightly in plastic wrap and then foil
- Freeze up to 3 months
- Thaw at room temperature for 1-2 hours, or reheat directly in a 350°F oven for 15-20 minutes
Freeze unbaked dough:
- After shaping, skip the second rise
- Wrap the shaped dough tightly and freeze
- Thaw in the refrigerator overnight
- Let it come to room temperature and rise for 30-40 minutes
- Apply garlic butter and bake normally
Reheating:
- Oven method (best): Wrap in foil and heat at 350°F for 10-15 minutes
- Microwave (quick): Wrap in a damp paper towel and microwave 30-45 seconds
- Toaster oven: 350°F for 8-10 minutes
Storage at room temperature:
- Keep in an airtight container or wrapped in plastic wrap
- Lasts 2-3 days at room temperature
- Longer than that, taste and texture start declining
Ingredient Substitutions & Variations
Don’t have instant yeast? Use active dry yeast (same amount). It takes slightly longer to activate but works the same way.
No fresh garlic? Use ½ teaspoon garlic powder (it’s more concentrated than fresh). Not ideal, but works.
No fresh parsley? Use 2 teaspoons dried parsley, or skip it entirely. The bread still tastes great.
Want it cheesier? Add 1 tablespoon grated Parmesan to the dough itself, plus more on top.
Prefer less garlic? Use 2-3 cloves instead of 4. You can always add more next time.
Want herbs? Add fresh basil, oregano, or thyme to the butter mixture (use 1 tablespoon total fresh herbs).
Nutrition Information (Per Slice)
| Nutrient | Amount |
|---|---|
| Calories | 145 |
| Protein | 4g |
| Carbohydrates | 22g |
| Fat | 4.5g |
| Fiber | 0.8g |
| Sugar | 1g |
| Sodium | 280mg |
Based on 10 slices per loaf. Calculated using the USDA database and standard ingredient values.
Serving Suggestions: What Pairs Perfectly with Homemade Garlic Bread
Garlic bread is the ultimate side dish that makes everything taste better. Here are the best ways to serve it:
Classic pasta pairing: Serve alongside spaghetti, lasagna, fettuccine Alfredo, or any Italian pasta dish. The garlic flavors complement each other perfectly.
Soup companion: Torn into pieces for dunking in tomato soup, minestrone, or French onion soup.
Appetizer board: Serve at parties or gatherings with hummus, salsa, cheese, cured meats, and olives.
Sandwich bread: Slice it and use it for sandwiches the next day. It’s sturdy enough to hold fillings.
Breakfast possibility: Top with a fried egg and cheese for a savory breakfast sandwich.
Simple dinner: Just garlic bread and a simple green salad makes a surprisingly satisfying meal.
Why Making Bread at Home Changes Everything
Here’s what I’ve learned from making garlic bread regularly: once you understand how bread works—how yeast eats flour, how gluten develops with kneading, how time creates flavor—you realize that making bread isn’t some mysterious, difficult skill. It’s just chemistry and patience.
The first time you pull your own homemade garlic bread from the oven, golden and steaming and smelling absolutely incredible, something shifts. You realize you can do this. You can take five basic ingredients and flour and create something that tastes like it came from a professional bakery.
More importantly, you’ll never want store-bought garlic bread again. Once you’ve tasted fresh, homemade garlic bread with real butter and real garlic, the frozen stuff at the grocery store won’t even compare.
So grab your flour, your yeast, some fresh garlic, and your favorite butter. Your kitchen is about to smell amazing. Your family is about to be amazed. And you’re about to prove to yourself that you can absolutely make restaurant-quality garlic bread at home.
Final Tips for Success
- Read the whole recipe first before you start. Knowing what’s coming helps you prepare.
- Use room temperature ingredients (except the liquids should be warm). Cold dough is harder to work with.
- Don’t skip the rises. They’re not wasted time—they’re where your bread gets its flavor and texture.
- Invest in fresh yeast. It’s inexpensive and makes a huge difference.
- Be gentle with risen dough. Rough handling pops air bubbles.
- Trust the process. If your kitchen is warm and your yeast is fresh, your bread will rise.
- Make it again. The second time you make this recipe, you’ll be faster and more confident.
Conclusion: Fresh, Hot Garlic Bread is Always Worth It
Making homemade garlic bread from scratch is simple, forgiving, and creates results that will impress everyone who tastes it. With all-purpose flour, basic ingredients, and just over two hours, you can have fresh, buttery, garlicky perfection on your table.
This recipe is beginner-friendly but produces professional-quality results. Your family will ask you to make it again. Your friends will want your recipe. And honestly? You’ll be amazed that something this delicious came from your own kitchen.
So the next time you’re planning dinner, skip the frozen section. Make your garlic bread from scratch instead. Your taste buds will thank you, your kitchen will smell incredible, and everyone will remember this meal.
Frequently Asked Questions
Can I use store-bought dough for this recipe?
Yes! You absolutely can use store-bought refrigerated bread dough or pizza dough. Just thaw it, shape it, let it rise for 20-30 minutes, apply the garlic butter, and bake. It won’t be quite as good as starting from scratch, but it’s a great shortcut when you’re busy.
What’s the difference between instant yeast and active dry yeast?
Instant yeast has smaller particles than active dry yeast, so it hydrates faster and works slightly quicker. You can use them interchangeably in the same amounts—it just takes active dry yeast a few minutes longer to activate and rise. Both work great for garlic bread.
Can I make this recipe without a stand mixer?
Absolutely! Knead by hand for 8-10 minutes. Yes, your arm will get a workout, but hand kneading is a great way to connect with your baking and feel when the dough is ready. Plus, you don’t need any special equipment.
Why is my dough sticky and hard to work with?
This usually means your liquid-to-flour ratio is off, or your kitchen is very warm. Try using slightly less milk (use ¾ cup minus 1 tablespoon instead), or chill your water and milk before using. If your kitchen is very warm (above 80°F), use cooler liquid.
Can I add other ingredients to the dough (sun-dried tomatoes, olives, cheese)?
Yes! Add up to ½ cup of mix-ins after kneading is mostly done. Fold them in gently and knead for another minute. This works great for flavor variations.
How do I know if my yeast is still alive?
Do the bloom test: mix a pinch of sugar, a pinch of yeast, and warm water. If it foams up within 5 minutes, your yeast is alive. If nothing happens after 10 minutes, the yeast is dead and you need fresh yeast.
Can I use whole wheat flour instead of all-purpose?
You can make a blend (like 50% all-purpose, 50% whole wheat), but 100% whole wheat makes dense, heavy garlic bread. Whole wheat has different gluten characteristics and absorbs liquid differently. If you want to try it, add an extra 1-2 tablespoons of water to the dough.
What if I don’t have Italian seasoning?
Mix your own: combine ½ teaspoon dried oregano, ¼ teaspoon dried basil, and ⅛ teaspoon dried thyme. Or just use one herb you like (basil or oregano alone works great).
Why didn’t my bread rise much?
Most common reasons: yeast is old/dead, the rising location wasn’t warm enough, or you used cold liquid instead of warm. The ideal rising temperature is 75-80°F. If your kitchen is cold, use warmer liquid (but not over 110°F or you’ll kill the yeast).
Can I make this recipe dairy-free?
You can replace the milk with unsweetened almond milk or oat milk (use the same amount). For the butter, use olive oil or dairy-free butter (use 3 tablespoons oil instead of 3 tablespoons solid butter in the dough, and 4 tablespoons oil instead of butter in the topping).
Related Recipes:
 Korean Retinol Tea Recipe: The Complete Guide to This Viral Anti-Aging Beauty Drink
 Korean Retinol Tea: Everything You Need to Know About This K-Beauty Wellness Trend
 Easy Homemade Whole Wheat Bread Recipe – Soft & Yummy Made at Home
 Easy Honey Wheat Bread Recipe: The Best Homemade Bread for Kids
 The BEST Whole Wheat Bread Machine Recipe (Super Easy!)
 How to Make Yummy Whole Wheat Sourdough Bread (It’s Easier Than You Think!)
 Soft and Yummy Whole Wheat Sandwich Bread Recipe (Must Try!)
 Korean Retinol Tea Loophole: The Viral TikTok Secret to Glowing Skin Without Harsh Retinol
 The Simplest Rustic Whole Wheat Bread Recipe You’ll Ever Make
 Easy Authentic Rougamo Bread Recipe: The Crispy Chinese Flatbread 2025 Recipe
 Bread Flour vs All-Purpose Flour: What’s the Difference?
 King Arthur Gluten-Free Sourdough Bread Recipe
 Easy Homemade Ezekiel Bread Recipe: Sprouted & Nutritious
 Best Garlic Bread Recipe from Scratch: Step by Step Guide
 Leavened vs Unleavened Bread: Complete Guide | Differences & Example
 Logan’s Viral Cucumber Salad Recipe – Easy 5-Minute Asian Cucumber Dish