Quick Summary:
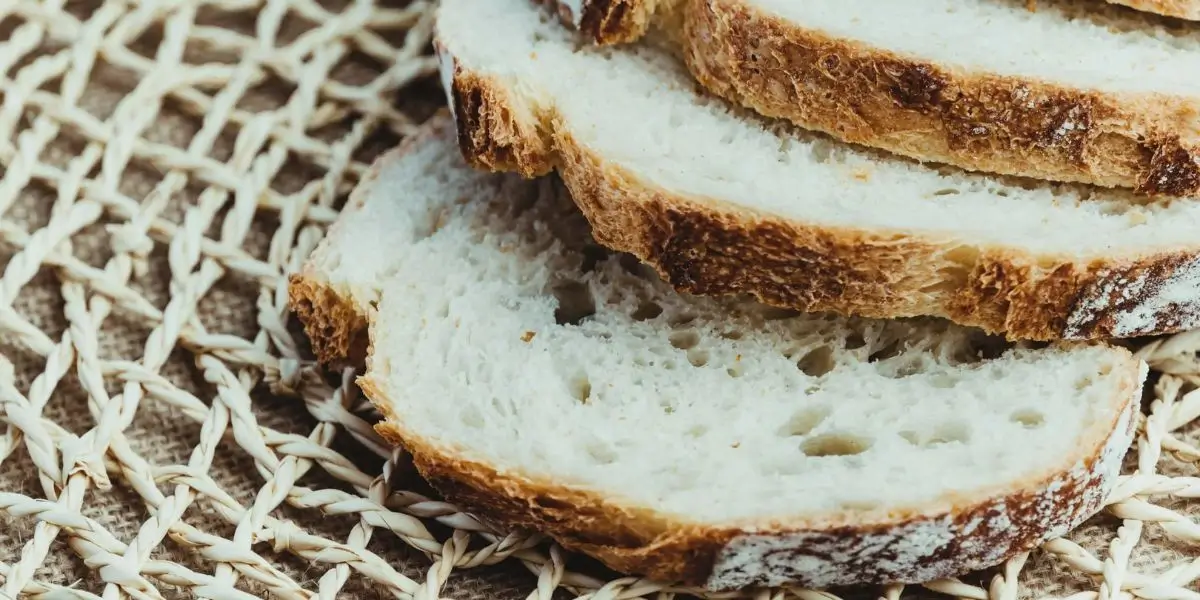
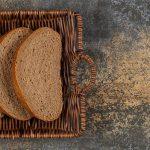
This King Arthur gluten-free sourdough bread recipe creates a soft, tangy loaf with perfect texture using simple ingredients. Ready in 24 hours with active prep time under 30 minutes, this recipe works every time for folks who can’t eat gluten.
Introduction
Making gluten-free sourdough bread that actually tastes good used to feel impossible. Trust me, I’ve been there – standing in my kitchen with another dense, gummy loaf that nobody wanted to eat. Everything changed when I discovered the right combination of King Arthur’s gluten-free flour and a few smart techniques.
This recipe creates bread that’s soft inside with a crispy crust that crackles when you slice it. My celiac friends can’t believe it’s gluten-free, and honestly, neither can I sometimes. The secret is using King Arthur Measure for Measure flour along with the right hydration level and fermentation time.
Related Guide: Authentic Rougamo Bread Recipe
Why King Arthur Flour Makes the Best Gluten-Free Sourdough
Understanding Your Flour Blend
King Arthur’s gluten-free flour isn’t just any flour substitute. It’s a carefully made blend that already has xanthan gum mixed in, which saves you money and guesswork. The blend contains rice flour, tapioca starch, and potato starch in just the right amounts.
What makes this flour special:
- Pre-mixed xanthan gum means better structure
- Consistent results every single time you bake
- Neutral taste that doesn’t overpower the sourdough tang
- Fine texture that creates a smooth crumb
Related Recipe: Honey Wheat Bread Recipe
The Magic of Psyllium Husk
While King Arthur flour has xanthan gum, adding psyllium husk takes your bread to the next level. This natural fiber creates stretchy dough that holds air bubbles just like regular bread dough. Use about 2 tablespoons per loaf – it makes all the difference between okay bread and amazing bread.
Pro tip: Mix psyllium husk with water first and let it gel for 5 minutes. This prevents clumps and helps it spread evenly through your dough.
Related Recipe: BEST Whole Wheat Bread Machine Recipe
Troubleshooting Common Gluten-Free Sourdough Problems
Fixing Gummy Texture
Nobody likes gummy bread. If your loaf feels wet or sticky inside, you’re not alone. This happens to everyone learning gluten-free baking. Here’s how to fix it:
- Bake it longer – Gluten-free bread needs more time than wheat bread
- Check the temperature – Internal temp should hit 205°F to 210°F
- Let it cool completely – I know it’s hard to wait, but cooling sets the structure
- Adjust water amounts – Start with less liquid and add more if needed
Preventing Dense, Heavy Loaves
Dense bread often comes from an inactive starter or wrong hydration levels. Your starter needs to double in size within 4-6 hours when fed. If it doesn’t, keep feeding it daily until it gets stronger.
Signs of a healthy starter:
- Doubles in 4-6 hours
- Smells tangy but pleasant
- Has lots of bubbles
- Passes the float test
Recipe Card
King Arthur Gluten-Free Sourdough Bread
Description: This foolproof gluten-free sourdough bread recipe uses King Arthur flour to create a soft, tangy loaf with perfect texture. No more dense or gummy bread!
Prep Time: 30 minutes
Rise Time: 18-24 hours
Cook Time: 45 minutes
Total Time: About 24 hours
Servings: 1 large loaf (12 slices)
Related Guide: Bread Flour vs All-Purpose Flour
Ingredients
For the Dough:
- 3 cups (360g) King Arthur Measure for Measure Gluten-Free Flour
- 1 cup (240g) active gluten-free sourdough starter
- 1¼ cups (300ml) room temperature water
- 2 tablespoons psyllium husk powder
- 1½ teaspoons salt
- 1 tablespoon honey or sugar
- 2 tablespoons olive oil
For Dusting:
- Rice flour for dusting the banneton
- Extra flour for scoring
Instructions
- Prepare psyllium gel. Mix psyllium husk with ½ cup of the water in a small bowl. Let it sit for 5 minutes until it forms a gel.
- Mix the dough. In a large bowl, combine flour and salt. In another bowl, mix starter, remaining water, honey, and olive oil. Add wet ingredients to dry ingredients.
- Add psyllium gel. Fold the psyllium gel into the dough using a spatula. Mix until everything comes together. The dough will be wetter than wheat dough – that’s normal.
- First rise. Cover the bowl with a damp towel. Let rise at room temperature for 4-6 hours until the dough grows by about 50%.
- Shape the loaf. Wet your hands to prevent sticking. Gently shape the dough into a round ball. Don’t overwork it – gluten-free dough is delicate.
- Second rise. Place shaped dough in a banneton dusted with rice flour, seam side up. Cover and refrigerate overnight (12-18 hours).
- Preheat the Dutch oven. Put your Dutch oven in the oven and heat to 450°F (230°C) for 30 minutes.
- Score the bread. Turn the dough onto the parchment paper. Score the top with a sharp knife or lame. Make one deep slash or a simple cross pattern.
- Bake covered. Carefully transfer the dough onto the parchment to the hot Dutch oven. Cover and bake for 30 minutes.
- Finish uncovered. Remove lid and bake another 15 minutes until crust is golden brown. Internal temperature should reach 205°F-210°F.
- Cool completely. This is crucial! Let bread cool on a wire rack for at least 2 hours before slicing. The structure continues setting as it cools.
Notes/Tips
Storage: Store in an airtight container for 3 days at room temperature or slice and freeze for up to 3 months.
Reheating: Toast frozen slices directly from the freezer. For the whole loaf, wrap in foil and warm at 350°F for 10 minutes.
Substitutions:
- Can’t find psyllium husk? Use 1 tablespoon of extra xanthan gum instead
- No Dutch oven? Use a regular loaf pan covered tightly with foil
- Dairy-free? This recipe is already dairy-free!
Make it your own: Add 2 tablespoons of seeds (sunflower, pumpkin, or sesame) for extra crunch and nutrition.
Nutrition Information (per slice)
- Calories: 145
- Carbohydrates: 28g
- Protein: 3g
- Fat: 3g
- Fiber: 2g
- Sodium: 290mg
Final Thoughts
Making gluten-free sourdough bread doesn’t have to be frustrating. With King Arthur flour and these simple techniques, you’ll bake loaves that rival any bakery. Remember – every oven is different, so don’t be afraid to adjust timing and temperature.
The most important things are using an active starter, getting the hydration right, and letting the bread cool completely. Master these three things, and you’ll never buy store-bought gluten-free bread again.
Frequently Asked Questions
Can I make this without a sourdough starter?
While this recipe requires sourdough starter for optimal flavor, a quick version can be made using 2 teaspoons of instant yeast instead. Mix everything and let it rise for just 2-3 hours before baking. It won’t have that tangy sourdough taste, but it’ll still be good bread.
Why is my gluten-free sourdough so dense?
Dense bread usually means your starter isn’t active enough or you need more water in the dough. Feed your starter daily until it doubles reliably in 4-6 hours. Also, gluten-free dough needs more liquid than wheat dough – it should look like thick brownie batter, not regular bread dough.
How do I know when my bread is fully baked?
The best way is to use a thermometer – it should read 205°F to 210°F in the center. No thermometer? The crust should be deep golden brown and sound hollow when you tap the bottom. If it feels heavy or sounds dull, bake it 10 more minutes.
Can I use a different gluten-free flour?
Yes, but results will vary. If using flour without xanthan gum, add 2 teaspoons per 3 cups of flour. Bob’s Red Mill 1-to-1 and Cup4Cup work okay, but King Arthur gives the most consistent results in this recipe.
How long does gluten-free sourdough starter take to make?
Starting from scratch takes about 7-10 days of daily feeding. Your starter needs at least 2 weeks to be strong enough for bread. Be patient – gluten-free starters sometimes take longer than wheat starters to get going.
Happy baking! Drop a comment below if you try this recipe – I’d love to hear how your bread turns out!
Related Recipes:
 Korean Retinol Tea Recipe: The Complete Guide to This Viral Anti-Aging Beauty Drink
 Korean Retinol Tea: Everything You Need to Know About This K-Beauty Wellness Trend
 Easy Homemade Whole Wheat Bread Recipe – Soft & Yummy Made at Home
 Easy Honey Wheat Bread Recipe: The Best Homemade Bread for Kids
 The BEST Whole Wheat Bread Machine Recipe (Super Easy!)
 How to Make Yummy Whole Wheat Sourdough Bread (It’s Easier Than You Think!)
 Soft and Yummy Whole Wheat Sandwich Bread Recipe (Must Try!)
 Korean Retinol Tea Loophole: The Viral TikTok Secret to Glowing Skin Without Harsh Retinol
 The Simplest Rustic Whole Wheat Bread Recipe You’ll Ever Make
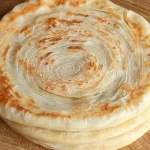 Easy Authentic Rougamo Bread Recipe: The Crispy Chinese Flatbread 2025 Recipe
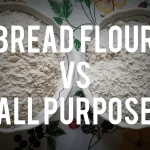 Bread Flour vs All-Purpose Flour: What’s the Difference?