
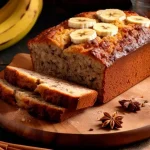
If you’ve ever wondered why Martha Stewart’s banana bread recipe has achieved legendary status among home bakers, you’re about to discover the secret. This isn’t just another banana bread recipe floating around the internet. This is THE recipe that has converted countless skeptics into believers, and the secret ingredient might surprise you.
Martha Stewart’s banana bread stands apart from every other recipe because of one simple addition: sour cream. This single ingredient transforms ordinary banana bread into an incredibly moist, tender, and flavorful masterpiece that stays fresh longer and tastes better with each passing day.
Whether you’re a first-time baker or a seasoned pro, this complete guide gives you everything you need to make perfect banana bread every single time. I’ve included pro tips, troubleshooting solutions, and variations that no other recipe provides.
Related Recipes:
Quick Overview:
| Detail | Information |
|---|---|
| Prep Time | 15 minutes |
| Cook Time | 55-65 minutes |
| Total Time | 1 hour 20 minutes |
| Servings | 12 slices |
| Difficulty | Easy |
| Calories | ~220 per slice |
Why Martha Stewart’s Banana Bread Is the Best
What separates Martha Stewart’s banana bread from the hundreds of other recipes you’ll find online? The answer lies in understanding what makes banana bread truly exceptional.
Most banana bread recipes follow a predictable formula: mash bananas, mix with standard ingredients, bake, and hope for the best. The result is often acceptable but rarely memorable. Martha Stewart approached this differently by asking a simple question: how do we make banana bread that’s impossibly moist without being dense?
The answer was sour cream.
Adding sour cream to banana bread accomplishes three things simultaneously:
- Moisture retention – The fat content in sour cream keeps the bread moist for days
- Tender crumb – The acidity breaks down gluten for a softer texture
- Subtle tang – Balances the sweetness and enhances banana flavor
When you compare this banana bread to versions made without sour cream, the difference is immediately noticeable. Regular banana bread often becomes dry within a day or two. Martha Stewart’s version stays moist for up to a week when stored properly.
The texture is another distinguishing factor. While many banana breads turn dense and heavy, this recipe produces a delicate crumb that melts on your tongue. Each slice holds together perfectly when cut, yet dissolves beautifully when you take a bite.
This is why bakers who discover this recipe rarely go back to their old versions. Once you’ve tasted banana bread this good, everything else feels like a compromise.
The Science Behind This Recipe
Understanding why this recipe works helps you become a better baker. When you know the science, you can troubleshoot problems, make successful substitutions, and adapt the recipe to your preferences without ruining the final product.
Why Sour Cream Makes It Moist
Sour cream contains approximately 20% fat, and fat is the enemy of dryness in baking. When you fold sour cream into your batter, you’re adding microscopic fat globules that coat flour proteins and prevent excessive gluten development.
But there’s more happening beneath the surface. Sour cream is acidic, with a pH around 4.5. This acidity serves a crucial purpose: it reacts with baking soda to produce carbon dioxide bubbles. These bubbles get trapped in the batter and expand during baking, creating lift and lightness.
The acidity also tenderizes the gluten structure. Gluten is the protein network that gives baked goods their structure, but too much gluten development makes bread tough and chewy. The acid in sour cream weakens these gluten bonds just enough to produce a tender, cake-like crumb.
Additionally, the moisture in sour cream doesn’t evaporate as quickly as water-based liquids during baking. This means more moisture stays locked inside the bread, resulting in that coveted moist texture even days after baking.
Why Overripe Bananas Are Essential
You’ve probably noticed that every banana bread recipe emphasizes using overripe bananas. This isn’t just tradition—it’s food chemistry at work.
As bananas ripen, several transformations occur:
Starch converts to sugar. Green bananas contain up to 25% starch by weight. As they ripen, enzymes break down this starch into simple sugars like glucose, fructose, and sucrose. A fully ripe banana with brown spots contains almost no starch but is loaded with natural sweetness.
Pectin breaks down. Pectin is the substance that keeps unripe bananas firm. As bananas ripen, pectin degrades, making the fruit soft and mashable. This also releases more moisture, which contributes to the bread’s texture.
Flavor compounds intensify. Ripe bananas develop higher concentrations of isoamyl acetate, the compound responsible for that distinctive banana aroma. Brown and black spots indicate maximum flavor development.
Moisture content increases. Overripe bananas contain more free moisture, which transfers into your batter and creates a moister final product.
Using bananas that aren’t ripe enough is one of the most common banana bread mistakes. If your bananas have no brown spots, your bread will lack both sweetness and moisture.
The Role of Each Ingredient
Every ingredient in Martha Stewart’s banana bread serves a specific purpose:
| Ingredient | Function |
|---|---|
| Butter | Provides flavor, moisture, and tenderness; creates rich mouthfeel |
| Sugar | Sweetens, helps browning, retains moisture, tenderizes |
| Eggs | Bind ingredients, provide structure, add moisture and richness |
| Flour | Creates structure through gluten development |
| Baking Soda | Reacts with acidic ingredients to create rise |
| Salt | Enhances all flavors, balances sweetness |
| Sour Cream | Adds moisture, tenderness, and subtle tang |
| Bananas | Primary flavor, natural sweetness, moisture |
| Vanilla | Enhances and rounds out all flavors |
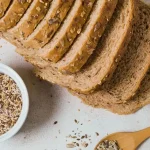
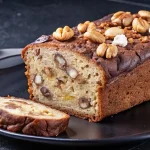
| Walnuts | Adds crunch, nuttiness, and textural contrast |
When you understand these roles, you can make informed decisions about substitutions. Removing or replacing an ingredient affects the final product in predictable ways.
Ingredients for Martha Stewart Banana Bread
Complete Ingredient List
Gather these ingredients before you begin. Having everything measured and ready (a technique called mise en place) makes the process smooth and prevents mistakes.
| Ingredient | US Measurement | Metric | Notes |
|---|---|---|---|
| Unsalted butter | ½ cup (1 stick) | 113g | Room temperature, softened |
| Granulated sugar | 1 cup | 200g | White sugar works best |
| Large eggs | 2 | 2 | Room temperature |
| All-purpose flour | 1½ cups | 190g | Spoon and level method |
| Baking soda | 1 teaspoon | 5g | Check freshness |
| Salt | ½ teaspoon | 3g | Fine table salt |
| Very ripe bananas | 3-4 medium | ~400g mashed | Brown/black skin |
| Sour cream | ½ cup | 120g | Full-fat preferred |
| Pure vanilla extract | 1 teaspoon | 5ml | Real vanilla, not imitation |
| Chopped walnuts | 1 cup | 120g | Optional, toasted preferred |
Ingredient Notes and Tips
Butter: Room temperature butter is essential for proper creaming. It should be soft enough to indent with your finger but not melting or greasy. Cold butter won’t cream properly, and melted butter changes the texture entirely. Take butter out of the refrigerator 30-45 minutes before baking.
Bananas: The ripeness of your bananas directly affects your final product. Look for bananas with extensive brown spotting or completely brown/black skins. These aren’t “bad” bananas—they’re perfect for baking. One medium banana yields approximately ⅓ cup mashed banana.
Sour Cream: Full-fat sour cream produces the best results because it contains more fat for moisture and richness. Low-fat or fat-free versions can work but produce a slightly drier, less tender bread.
Flour: How you measure flour dramatically affects your results. Spooning flour into your measuring cup and leveling with a knife yields approximately 125g per cup. Scooping directly from the bag compacts the flour and can add 25-30% more than intended, resulting in dry, dense bread.
Baking Soda: This leavening agent loses potency over time. If your baking soda has been open for more than 6 months, test it by dropping a small amount into vinegar. Active baking soda will fizz vigorously. If it barely bubbles, replace it.
Walnuts: Toasting walnuts before adding them to the batter intensifies their flavor significantly. Spread them on a baking sheet and toast at 350°F for 5-7 minutes until fragrant. Let cool before chopping and adding to batter.
Ingredient Substitutions
Life happens, and sometimes you don’t have exactly what you need. Here are tested substitutions that work:
| Original Ingredient | Substitution | Adjustment Needed |
|---|---|---|
| Sour cream | Greek yogurt (full-fat) | Use equal amount |
| Sour cream | Buttermilk | Use equal amount, bread may be slightly less rich |
| Sour cream | Regular milk + lemon juice | ½ cup milk + 1 tbsp lemon juice, let sit 5 minutes |
| All-purpose flour | Whole wheat flour | Use ¾ cup whole wheat + ¾ cup all-purpose for best results |
| All-purpose flour | Gluten-free 1:1 blend | Equal amount, add ¼ tsp xanthan gum if blend doesn’t contain it |
| Butter | Coconut oil | Equal amount, solid not melted |
| Butter | Unsweetened applesauce | Use half butter, half applesauce for lower fat version |
| Eggs | Flax eggs | 1 tbsp ground flax + 3 tbsp water per egg, let gel 5 minutes |
| Walnuts | Pecans | Equal amount, similar flavor profile |
| Walnuts | Chocolate chips | Equal amount, adjust sweetness expectations |
| Granulated sugar | Brown sugar | Equal amount, adds slight molasses flavor and more moisture |
Important: Substitutions change the final product. The original recipe produces the intended result. Use substitutions when necessary, but understand your bread will be slightly different.
How to Ripen Bananas for Banana Bread
Found the perfect recipe but your bananas are still yellow? Don’t worry. Several reliable methods can speed up the ripening process without sacrificing quality.
The Paper Bag Method (1-2 Days)
This natural method accelerates ripening using the bananas’ own ethylene gas.
Steps:
- Place yellow bananas in a brown paper bag
- Fold the top closed loosely (don’t seal airtight)
- Leave at room temperature away from direct sunlight
- Check after 24 hours
How it works: Bananas produce ethylene gas as they ripen. The paper bag traps this gas around the fruit while still allowing some air circulation to prevent moisture buildup. Concentrated ethylene triggers faster ripening.
Pro tip: Add an apple or another ripe banana to the bag. These fruits also produce ethylene, speeding the process even more.
The Oven Method (30 Minutes)
When you need ripe bananas immediately, the oven method delivers. This technique won’t produce bananas identical to naturally ripened ones, but it works well for baking.
Steps:
- Preheat oven to 300°F (150°C)
- Place unpeeled bananas on a parchment-lined baking sheet
- Bake for 15-30 minutes until skins turn completely black
- Remove and let cool until handleable
- Peel carefully—the insides will be very soft and liquidy
Important notes: Oven-ripened bananas become mushier than naturally ripened ones and release more liquid. This extra moisture won’t ruin your bread, but you may want to drain off any excess liquid before mashing. The flavor won’t be quite as developed as naturally ripened bananas, but the results are still excellent.
The Freezer Method (Overnight + Thaw Time)
Freezing bananas and thawing them mimics the cell breakdown that occurs during ripening.
Steps:
- Place unpeeled bananas in the freezer overnight
- Remove and thaw at room temperature for 2-3 hours
- Peel (the skins will slip off easily)
- Drain excess liquid if desired
When to use this method: This works best when you have bananas that are almost ripe but need a final push. It’s also perfect for using up bananas before they go bad—freeze them and thaw later when you’re ready to bake.
Visual Ripeness Guide
| Banana Appearance | Ripeness Level | Good for Banana Bread? |
|---|---|---|
| Solid green | Unripe | No—too starchy, not sweet |
| Yellow with green tips | Underripe | No—still too firm and starchy |
| Solid yellow | Just ripe | No—needs more sugar development |
| Yellow with brown spots | Ripe | Getting there—acceptable but not ideal |
| More brown than yellow | Very ripe | Yes—perfect for baking |
| Completely brown/black | Overripe | Yes—maximum sweetness and moisture |
The golden rule: When you think your bananas are too ripe to eat, they’re perfect for banana bread.
Equipment You’ll Need
Having the right equipment makes baking easier and more successful. Here’s what you need:
Essential Equipment
| Equipment | Size/Type | Why It Matters |
|---|---|---|
| Loaf pan | 9×5 inches | Standard size for this recipe; 8×4 works but bakes differently |
| Mixing bowls | Various sizes | Large for batter, medium for dry ingredients |
| Electric mixer | Stand or hand | Creaming butter properly; hand mixing possible but more work |
| Measuring cups | Dry and liquid | Accurate measurements ensure consistent results |
| Measuring spoons | Set | For smaller amounts |
| Rubber spatula | — | Folding ingredients, scraping bowl |
| Wire cooling rack | — | Proper cooling prevents soggy bottom |
| Toothpick or cake tester | — | Testing doneness |
Equipment Notes
Loaf Pan Size: This recipe is designed for a 9×5-inch pan. Using an 8×4-inch pan will work, but your bread will be taller and require 10-15 minutes additional baking time. Metal pans conduct heat better than glass; if using glass, reduce oven temperature by 25°F.
Electric Mixer vs. Hand Mixing: An electric mixer makes creaming butter and sugar much easier and produces better results. If mixing by hand, make sure butter is very soft and beat vigorously for 3-4 minutes to achieve proper creaming.
Step-by-Step Directions
Follow these detailed steps for perfect banana bread. Each step includes explanations of what’s happening and what to look for.
Step 1: Prep Work (5 Minutes)
Preheat your oven to 350°F (175°C). Position a rack in the center of the oven where heat circulates most evenly.
Prepare your loaf pan using one of these methods:
- Butter and flour: Coat with softened butter, add 1 tablespoon flour, shake to coat, tap out excess
- Parchment sling: Line with parchment paper leaving overhang on long sides for easy removal
- Non-stick spray: Quick but less reliable for clean release
Mash your bananas in a medium bowl using a fork or potato masher. Some small lumps are fine—you don’t need a completely smooth puree. The banana pieces add moisture pockets and texture to your finished bread.
Measure all ingredients and set them out. Having everything ready prevents mistakes and makes the process smooth.
Step 2: Cream Butter and Sugar (3 Minutes)
Place the softened butter in a large mixing bowl or the bowl of your stand mixer. Beat on medium speed for about 30 seconds until smooth.
Add the sugar and beat on medium-high speed for 2-3 minutes until the mixture becomes:
- Light in color (pale yellow, almost white)
- Fluffy in texture (increased volume)
- Smooth with no visible butter chunks
What’s happening: Creaming incorporates air into the butter-sugar mixture. These tiny air pockets expand during baking and contribute to the bread’s rise and tender texture. Under-creaming produces a denser bread.
Visual check: The mixture should look like fluffy frosting, not wet sand. If it looks greasy or flat, continue beating.
Step 3: Add Eggs (2 Minutes)
Add eggs one at a time, beating well after each addition. Scrape down the sides of the bowl between eggs to ensure everything incorporates evenly.
After adding both eggs, the mixture may look slightly curdled or separated. This is normal and will smooth out when you add the flour.
Why one at a time: Adding eggs gradually allows them to emulsify properly with the butter. Dumping both eggs at once can cause the mixture to “break” and become separated, which affects final texture.
Step 4: Mix Dry Ingredients (2 Minutes)
In a separate medium bowl, whisk together:
- 1½ cups all-purpose flour
- 1 teaspoon baking soda
- ½ teaspoon salt
Whisk for at least 20 seconds to evenly distribute the baking soda and salt throughout the flour.
Why this matters: Baking soda clumps easily. If you add it directly to the batter without mixing it into the flour first, you might get pockets of intense, bitter baking soda flavor and uneven rising.
Step 5: Combine Wet and Dry (2 Minutes)
Reduce mixer speed to low. Add the flour mixture in three additions, mixing just until combined after each addition. Stop mixing as soon as you no longer see dry flour streaks.
Critical warning: Do not overmix. Overmixing develops too much gluten, resulting in tough, chewy bread instead of tender, cake-like texture. A few small lumps are perfectly acceptable.
Visual check: Batter should be thick but smooth, similar to thick pancake batter. You should see no dry flour pockets.
Step 6: Add Bananas, Sour Cream, and Vanilla (1 Minute)
Add the mashed bananas, sour cream, and vanilla extract to the batter. Fold in gently using a rubber spatula or mix on lowest speed just until combined.
Folding technique: Cut down through the center of the batter, sweep along the bottom of the bowl, and fold over the top. Rotate the bowl and repeat until ingredients are incorporated.
Batter consistency: The final batter will be thick, lumpy (from banana pieces), and slightly sticky. It should mound on a spoon rather than pour smoothly.
Step 7: Add Nuts (Optional) (1 Minute)
If using walnuts, fold them in gently with a spatula. Distribute them evenly throughout the batter without overmixing.
Toasting tip: If you haven’t toasted your walnuts, you can add them directly. But toasted nuts add significantly more flavor—it’s worth the extra 5 minutes.
Not using nuts? Skip this step entirely. The bread is equally delicious without them.
Step 8: Bake (55-65 Minutes)
Pour the batter into your prepared loaf pan. Spread evenly with a spatula, making sure to push batter into the corners.
Place in the preheated oven and bake for 55-65 minutes.
Timing guidelines:
- At 45 minutes: Check bread. If top is browning too quickly, tent loosely with aluminum foil
- At 55 minutes: Begin testing for doneness
- At 60 minutes: Most loaves are done
- At 65 minutes: Maximum time needed
How to test doneness:
| Test Method | Done When |
|---|---|
| Toothpick test | Inserted in center comes out clean or with few moist crumbs (not wet batter) |
| Internal temperature | Thermometer reads 200-205°F (93-96°C) in center |
| Visual check | Top is deeply golden brown and cracked down the center |
| Touch test | Top springs back when gently pressed |
The crack is normal: Almost all banana bread develops a crack along the top during baking. This happens because the top sets before the interior finishes rising, so the expanding interior pushes through the crust. It’s a sign of proper baking, not a mistake.
Step 9: Cool Properly (30+ Minutes)
Remove the pan from the oven and place on a wire cooling rack. Let the bread cool in the pan for 10 minutes.
After 10 minutes, run a knife around the edges and carefully turn the bread out onto the cooling rack. If you used a parchment sling, simply lift the bread out using the paper overhang.
Let the bread cool for at least 20 more minutes before slicing.
Why cooling matters: Cutting into hot banana bread seems tempting, but the interior is still setting during this cooling period. Slicing too soon results in:
- Gummy, underset texture
- Crumbly, falling-apart slices
- Steam escaping (moisture loss)
For best flavor: Many bakers agree that banana bread tastes even better the next day after flavors have melded. If you can resist, wrap cooled bread and wait until tomorrow.
Recipe Card
Martha Stewart Banana Bread
The best banana bread recipe featuring sour cream for incredible moisture and tender texture.
Prep Time: 15 minutes
Cook Time: 60 minutes
Total Time: 1 hour 15 minutes
Yield: 1 loaf (12 slices)
Ingredients
- ½ cup (1 stick/113g) unsalted butter, room temperature
- 1 cup (200g) granulated sugar
- 2 large eggs, room temperature
- 1½ cups (190g) all-purpose flour
- 1 teaspoon baking soda
- ½ teaspoon salt
- 3-4 very ripe bananas, mashed (about 1⅓ cups)
- ½ cup (120g) sour cream
- 1 teaspoon pure vanilla extract
- 1 cup (120g) chopped walnuts (optional)
Instructions
- Preheat oven to 350°F. Butter and flour a 9×5-inch loaf pan.
- Cream butter and sugar until light and fluffy, 2-3 minutes.
- Add eggs one at a time, beating after each.
- Whisk flour, baking soda, and salt in a separate bowl.
- Add flour mixture to butter mixture, mixing until just combined.
- Fold in mashed bananas, sour cream, and vanilla.
- Fold in walnuts if using.
- Pour into prepared pan and smooth top.
- Bake 55-65 minutes until toothpick comes out clean.
- Cool in pan 10 minutes, then turn out onto rack.
Nutrition Per Slice
Calories: 220 | Fat: 9g | Carbs: 32g | Protein: 4g | Sugar: 18g
Pro Tips for Perfect Banana Bread Every Time
These expert tips come from testing this recipe dozens of times and learning what makes the difference between good and exceptional banana bread.
| Tip | Why It Works |
|---|---|
| Use the ripest bananas possible | Brown and black skins mean maximum sugar development and moisture |
| Room temperature ingredients | Cold eggs and butter don’t emulsify properly, affecting texture |
| Don’t skip the creaming step | Those air bubbles create lift and tenderness |
| Measure flour correctly | Spoon into cup and level; don’t scoop from bag |
| Mix dry ingredients separately | Ensures even distribution of leavening and salt |
| Never overmix the batter | Overdeveloped gluten = tough, dense bread |
| Toast your walnuts | Five minutes of toasting doubles the nutty flavor |
| Use full-fat sour cream | More fat = more moisture and richness |
| Don’t open oven during first 45 minutes | Temperature drop can cause sinking |
| Test in multiple spots | Ensures center is fully baked |
| Tent with foil if browning too fast | Prevents burnt top while center finishes |
| Cool completely before slicing | Hot bread = gummy texture and crumbly slices |
| Wait a day for best flavor | Flavors meld and deepen overnight |
Secret pro tip: For an extra-special touch, sprinkle raw sugar or turbinado sugar on top of the batter before baking. It creates a beautiful, crunchy crust.
Common Mistakes to Avoid
Even experienced bakers make these errors. Learn from them before you start.
Using Underripe Bananas
The mistake: Using bananas that are still yellow with few or no brown spots.
Why it’s a problem: Underripe bananas contain more starch and less sugar. Your bread will be less sweet, less flavorful, and drier than intended. The banana flavor will be weak and the texture may be gummy.
The solution: Wait for bananas to develop extensive brown spots, or use one of the ripening methods described above. When you think they’re too ripe to eat, they’re perfect for baking.
Overmixing the Batter
The mistake: Mixing the batter until completely smooth or using high mixer speed after adding flour.
Why it’s a problem: Flour contains proteins that form gluten when mixed with liquid and agitated. Some gluten provides structure, but too much makes bread tough, chewy, and dense with a tight crumb.
The solution: Add flour and mix on low speed only until you no longer see dry streaks. A few small lumps are fine. Switch to folding with a spatula once bananas are added.
Wrong Pan Size
The mistake: Using an 8×4-inch pan when recipe calls for 9×5-inch, or vice versa.
Why it’s a problem: An 8×4 pan is about 25% smaller than a 9×5 pan. Using the smaller pan means batter will be higher and require significantly longer baking time. The outside may overcook before the inside is done.
The solution: Use the correct size pan. If you only have 8×4, increase baking time by 15-20 minutes and tent with foil if top browns too quickly. Alternatively, bake extra batter as muffins.
Not Testing for Doneness
The mistake: Relying only on baking time without testing the bread.
Why it’s a problem: Every oven is different, and factors like altitude, humidity, and actual oven temperature vary. Your bread might be done at 50 minutes or might need 70 minutes.
The solution: Start testing at 50-55 minutes using the toothpick test and internal temperature. The toothpick should come out clean or with only a few moist crumbs. Internal temperature should read 200-205°F.
Cutting Too Soon
The mistake: Slicing into the bread immediately out of the oven or after only a few minutes of cooling.
Why it’s a problem: Banana bread continues cooking from residual heat after leaving the oven. The center needs time to set. Cutting too soon releases steam (losing moisture) and results in a gummy, underset interior.
The solution: Wait at least 30 minutes before slicing. For best texture, wait until bread is completely cool. Even better: wait until the next day.
Skipping the Sour Cream
The mistake: Leaving out sour cream without making a proper substitution.
Why it’s a problem: Sour cream provides moisture, fat, and acidity that affect both texture and rise. Without it, your bread will be drier and denser.
The solution: If you don’t have sour cream, use Greek yogurt as an equal substitution. Buttermilk also works but produces a slightly different texture. Don’t simply leave it out.
Troubleshooting Martha Stewart Banana Bread
Something went wrong? This guide helps you identify the problem and fix it next time.
| Problem | Likely Cause | Solution |
|---|---|---|
| Sinking in the middle | Underbaked; opened oven too early; too much leavening | Bake longer; don’t open oven before 45 minutes; measure baking soda carefully |
| Too dense and heavy | Overmixed batter; too much flour; eggs too cold | Mix until just combined; measure flour by spooning and leveling; use room temp eggs |
| Dry and crumbly | Overbaked; not enough banana; omitted sour cream | Reduce baking time; use very ripe bananas; include sour cream |
| Burnt top, raw inside | Oven too hot; pan too small | Reduce temperature by 25°F; use correct pan size; tent with foil |
| Didn’t rise properly | Old baking soda; overmixed batter; oven too cool | Use fresh leavening; mix gently; check oven temperature with thermometer |
| Gummy or wet texture | Underbaked; cut too soon; too much banana liquid | Bake until toothpick clean; cool completely; drain excess banana liquid |
| Large crack on top | This is normal! | Not a problem—it’s characteristic of banana bread |
| Pale color | Underbaked; oven too cool | Bake longer; increase temperature slightly |
| Stuck to pan | Pan not properly greased; removed too early | Butter and flour thoroughly or use parchment; wait 10 minutes before removing |
| Uneven baking | Oven hot spots | Rotate pan 180° halfway through baking |
Pro tip: Get an oven thermometer. Many ovens run 25-50°F hotter or cooler than the displayed temperature. This single tool solves many baking problems.
How to Store Banana Bread
Proper storage keeps your banana bread fresh and delicious for as long as possible.
Room Temperature Storage (3-4 Days)
Room temperature is ideal for short-term storage when you plan to eat the bread within a few days.
Method:
- Let bread cool completely (at least 1 hour)
- Wrap tightly in plastic wrap, pressing out air
- Alternatively, place in an airtight container or zip-top bag
- Store in a cool, dry place away from direct sunlight
Tips:
- A bread box works well if you have one
- Avoid storing near the stove or in warm areas
- If your kitchen is very humid, consider refrigerating
Refrigerator Storage (Up to 1 Week)
Refrigeration extends shelf life but can slightly dry out the bread due to the cold environment.
Method:
- Cool bread completely
- Wrap tightly in plastic wrap
- Place in airtight container or zip-top bag for extra protection
- Store in the main refrigerator compartment (not the door)
Before serving: Let bread come to room temperature for 20-30 minutes. Alternatively, warm slices in a 300°F oven for 5 minutes or microwave for 15-20 seconds.
Signs Your Banana Bread Has Gone Bad
| Sign | What It Means |
|---|---|
| Visible mold spots | Discard immediately |
| Sour or off smell | Bacterial growth—do not eat |
| Slimy or sticky texture | Spoiled—throw away |
| Extreme dryness | Safe to eat but quality has declined |
When in doubt, throw it out. Mold can penetrate deeper than visible spots indicate.
How to Freeze Banana Bread
Freezing is the best option for long-term storage. Properly frozen banana bread lasts 3-4 months without significant quality loss.
Freezing a Whole Loaf
Method:
- Cool bread completely (crucial—warm bread creates ice crystals)
- Wrap tightly in plastic wrap, covering all surfaces
- Wrap again in aluminum foil for extra protection
- Place in a freezer-safe zip-top bag, squeezing out air
- Label with date and contents
- Freeze flat until solid
Storage duration: Up to 4 months at 0°F or below
Freezing Individual Slices
This method is perfect for grab-and-go portions.
Method:
- Cool bread completely
- Slice into individual portions
- Place small pieces of parchment paper between each slice
- Stack slices and wrap bundle in plastic wrap
- Place in freezer bag, remove air, seal
- Label and freeze
Advantage: Pull out only what you need without thawing the entire loaf
How to Thaw Banana Bread
| Method | Time | Best For |
|---|---|---|
| Room temperature | 2-3 hours | Whole loaf, no rush |
| Refrigerator overnight | 8-12 hours | Planning ahead, prevents condensation |
| Microwave | 20-30 seconds per slice | Single portions, immediate need |
| Oven refresh | 10-15 minutes at 300°F | Whole loaf, warm serving |
Best practice: Thaw at room temperature or in the refrigerator, then warm briefly in the oven for freshly-baked taste and texture.
Important: Once thawed, consume within 3-4 days. Do not refreeze previously frozen banana bread.
Delicious Variations
Martha Stewart’s base recipe adapts beautifully to many variations. Here are the most popular options:
Chocolate Chip Banana Bread
Transform classic banana bread into a chocolate lover’s dream.
Modification: Add 1 cup (175g) semi-sweet or dark chocolate chips to the batter when you would add walnuts.
Tips:
- Mini chips distribute more evenly
- Reserve ¼ cup chips to press into top before baking
- Dark chocolate (60-70%) pairs beautifully with banana
- Can combine with half quantity of nuts
Banana Nut Bread with Walnuts
The classic version with toasted walnuts for crunch and flavor.
Modification: Toast 1 cup chopped walnuts at 350°F for 5-7 minutes. Cool before folding into batter.
Nut alternatives:
- Pecans: Slightly sweeter, softer texture
- Almonds: Milder flavor, more crunch
- Hazelnuts: Rich, distinctive flavor
- Mixed nuts: Variety in every bite
Without Sour Cream Version
Don’t have sour cream? These substitutions work well.
Options:
- Greek yogurt: Use equal amount, closest result
- Buttermilk: Equal amount, slightly tangier
- Regular milk + acid: ½ cup milk + 1 tablespoon lemon juice or vinegar, let sit 5 minutes
Cream Cheese Frosting Topping
Elevate your banana bread to dessert status with tangy-sweet cream cheese frosting.
Simple Frosting Recipe:
- 4 oz cream cheese, softened
- 2 tablespoons butter, softened
- 1 cup powdered sugar
- ½ teaspoon vanilla extract
Beat until smooth and spread on completely cooled bread.
Note: Frosted banana bread must be refrigerated and is best consumed within 3 days.
Streusel Topped Banana Bread
A buttery, crunchy topping takes this bread over the top.
Streusel Recipe:
- ¼ cup flour
- ¼ cup brown sugar
- 2 tablespoons cold butter, cubed
- ¼ cup chopped walnuts
- Pinch of cinnamon
Mix flour, sugar, and cinnamon. Cut in butter until crumbly. Stir in nuts. Sprinkle over batter before baking.
More Variation Ideas
| Variation | Add to Batter |
|---|---|
| Double chocolate | ¼ cup cocoa powder + chocolate chips |
| Peanut butter | ½ cup peanut butter swirled on top |
| Coconut | ½ cup shredded coconut + coconut extract |
| Blueberry | 1 cup fresh blueberries |
| Cinnamon swirl | Cinnamon sugar layered in middle |
| Espresso | 1 tablespoon instant espresso powder |
| Orange | Zest of 1 orange |
| Maple walnut | 2 tablespoons maple syrup + walnuts |
Nutrition Information
Understanding the nutritional content helps you make informed decisions about portions and dietary planning.
Per Slice (Based on 12 Slices)
| Nutrient | Amount | % Daily Value* |
|---|---|---|
| Calories | 220 | 11% |
| Total Fat | 9g | 12% |
| Saturated Fat | 5g | 25% |
| Trans Fat | 0g | — |
| Cholesterol | 55mg | 18% |
| Sodium | 180mg | 8% |
| Total Carbohydrates | 32g | 12% |
| Dietary Fiber | 1g | 4% |
| Total Sugars | 18g | — |
| Added Sugars | 14g | 28% |
| Protein | 4g | 8% |
| Vitamin D | 0.3mcg | 2% |
| Calcium | 25mg | 2% |
| Iron | 1mg | 6% |
| Potassium | 150mg | 3% |
*Percent Daily Values based on a 2,000 calorie diet
Note: Nutritional values are estimates and vary based on specific ingredients used, banana size, and optional add-ins.
Dietary Considerations
| Diet | Compatible? | Notes |
|---|---|---|
| Vegetarian | Yes | Contains eggs and dairy |
| Vegan | No | Contains butter, eggs, sour cream |
| Gluten-Free | No | Contains all-purpose flour (substitution available) |
| Dairy-Free | No | Contains butter and sour cream (substitutions available) |
| Nut-Free | Yes | Omit walnuts |
| Low-Sugar | No | High sugar content |
Serving Suggestions
Martha Stewart’s banana bread is perfect on its own, but the right accompaniments can elevate the experience.
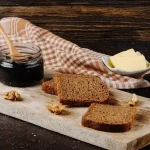
Best Toppings
| Topping | Flavor Profile | Best For |
|---|---|---|
| Salted butter | Rich, creamy, slight salt contrast | Classic breakfast |
| Cream cheese | Tangy, creamy, rich | Brunch |
| Nutella | Chocolate-hazelnut decadence | Dessert or snack |
| Honey | Natural sweetness, floral notes | Light topping |
| Peanut butter | Protein boost, nutty richness | Satisfying snack |
| Mascarpone | Light, creamy, Italian-style | Special occasion |
| Apple butter | Autumn warmth, spiced sweetness | Fall pairing |
| Jam or preserves | Fruity, sweet | Breakfast variety |
Perfect Beverage Pairings
| Beverage | Why It Works |
|---|---|
| Coffee | Bitter notes contrast sweetness; classic pairing |
| Black tea | Tannins cut richness |
| Chai latte | Spices complement banana |
| Milk | Classic, refreshing, balances sweetness |
| Hot chocolate | Indulgent dessert pairing |
When to Serve
Breakfast: Slice and toast lightly, serve with butter and coffee
Brunch: Arrange slices on a platter with cream cheese and fresh fruit
Afternoon snack: Perfect with tea for an afternoon pick-me-up
Dessert: Warm slice with vanilla ice cream and caramel drizzle
Gifts: Wrap a loaf beautifully for hostess gifts, holidays, or new neighbor welcomes
Frequently Asked Questions
Can I Make Martha Stewart Banana Bread Without Sour Cream?
Yes, you can substitute sour cream with several alternatives:
Best substitutes:
- Full-fat Greek yogurt (equal amount) – closest result
- Buttermilk (equal amount) – slightly tangier
- Whole milk plus acid (½ cup milk + 1 tablespoon lemon juice)
The texture will be slightly different without sour cream, but the bread will still be delicious. The sour cream version is more moist and tender, so expect your substitute version to be a bit lighter.
Why Is My Banana Bread Dense?
Dense banana bread typically results from one of these causes:
- Overmixing: Too much stirring develops excess gluten, making bread heavy
- Too much flour: Scooping flour from the bag compacts it; spoon and level instead
- Underripe bananas: Less moisture and natural sugar
- Old leavening: Baking soda loses potency after 6 months
Fix for next time: Mix batter only until ingredients are just combined, measure flour properly, and use very ripe bananas with fresh baking soda.
Can I Use Frozen Bananas?
Absolutely! Frozen bananas work excellently for banana bread.
How to use:
- Thaw bananas at room temperature for 1-2 hours
- Drain off excess liquid that accumulates (or add to batter for extra moisture)
- Mash and use as directed
Frozen bananas often produce even moister bread because freezing breaks down cell walls, releasing more liquid and creating softer texture.
What Makes Martha Stewart’s Recipe Different?
The key difference is sour cream. Most banana bread recipes rely only on bananas for moisture, but Martha Stewart’s addition of sour cream provides:
- Extra fat for richness and moisture retention
- Acidity that tenderizes gluten for softer texture
- Subtle tang that balances sweetness
- Extended freshness (stays moist longer)
This combination creates a banana bread that’s noticeably more moist and tender than traditional versions.
How Ripe Should Bananas Be?
As ripe as possible. The ideal bananas have:
- Brown or black spots covering most of the peel
- Soft, easily mashable flesh
- Strong banana aroma
- Sweet taste (if you sample)
If your bananas are only yellow with a few spots, wait a few more days or use an accelerated ripening method.
Remember: When bananas look too ripe to eat, they’re perfect for baking.
Can I Double This Recipe?
Yes, you can double this recipe successfully.
Important:
- Use two 9×5-inch loaf pans
- Do NOT try to bake in one larger pan (won’t cook evenly)
- Baking time remains approximately the same
- Make sure both pans fit in your oven with space between for air circulation
Why Did My Banana Bread Crack on Top?
This is completely normal and expected!
The crack happens because the outer crust sets before the interior finishes rising. As the inside continues to expand from heat and leavening action, it pushes through the set top, creating the characteristic crack.
A cracked top is a sign of proper oven spring and is considered desirable. It’s not a mistake—it’s a feature!
Can I Make This Gluten-Free?
Yes. Replace all-purpose flour with a 1:1 gluten-free flour blend (like Bob’s Red Mill or King Arthur).
Tips:
- Choose a blend that contains xanthan gum
- If your blend doesn’t contain xanthan gum, add ¼ teaspoon
- Let the batter rest 5 minutes before baking to allow flour to hydrate
- Gluten-free version may be slightly denser
How Do I Know When It’s Done?
Use multiple tests for certainty:
| Test | Done When |
|---|---|
| Toothpick test | Comes out clean or with few moist crumbs |
| Internal temperature | 200-205°F (93-96°C) |
| Visual | Golden brown top, cracked |
| Touch | Top springs back when gently pressed |
| Timing | After 55-65 minutes |
If the toothpick comes out with wet batter, continue baking in 5-minute increments.
Can I Make Muffins Instead?
Yes! This batter makes excellent muffins.
Adjustments:
- Line a 12-cup muffin tin with paper liners
- Fill each cup ⅔ full
- Bake at 350°F for 20-25 minutes
- Test with toothpick for doneness
Note: You may have extra batter beyond 12 muffins depending on how full you fill the cups.
Can I Add Other Fruits?
Yes, but be mindful of moisture content:
| Fruit | Amount | Notes |
|---|---|---|
| Blueberries | 1 cup | Toss in flour first to prevent sinking |
| Raspberries | ¾ cup | Very moist; may create wet pockets |
| Strawberries | 1 cup diced | Pat dry before adding |
| Mango | ¾ cup diced | Reduce banana slightly |
| Peaches | 1 cup diced | Pat dry; pairs well with banana |
How Many Bananas Do I Need?
For this recipe: 3-4 medium bananas (approximately 1⅓ cups mashed)
Banana size guide:
- Small banana = about ⅓ cup mashed
- Medium banana = about ⅓ to ½ cup mashed
- Large banana = about ½ cup mashed
When in doubt, aim for 1⅓ cups mashed banana total. A little more is better than not enough.
Final Thoughts
Martha Stewart’s banana bread recipe has earned its legendary status for good reason. The combination of perfectly ripe bananas and the secret ingredient—sour cream—creates a loaf that’s impossibly moist, tender, and flavorful.
Now you have everything you need to make this recipe perfectly:
- Understanding of why each ingredient matters
- Step-by-step guidance for foolproof results
- Pro tips that elevate your baking
- Solutions for common problems
- Storage methods to keep it fresh
- Variations to explore
The beauty of this recipe is its reliability. Once you master the technique, you’ll produce consistently excellent banana bread every time. And with so many variations possible, you’ll never get bored.
Don’t let those overripe bananas go to waste. Preheat your oven, gather your ingredients, and discover why millions of bakers consider this the best banana bread recipe ever created.
Happy baking!
Related Recipes:
 Easy Homemade Whole Wheat Bread Recipe – Soft & Yummy Made at Home
 Easy Honey Wheat Bread Recipe: The Best Homemade Bread for Kids
 The BEST Whole Wheat Bread Machine Recipe (Super Easy!)
 How to Make Yummy Whole Wheat Sourdough Bread (It’s Easier Than You Think!)
 Soft and Yummy Whole Wheat Sandwich Bread Recipe (Must Try!)
 Easy Authentic Rougamo Bread Recipe: The Crispy Chinese Flatbread 2025 Recipe
 Bread Flour vs All-Purpose Flour: What’s the Difference?
 King Arthur Gluten-Free Sourdough Bread Recipe
 Easy Homemade Ezekiel Bread Recipe: Sprouted & Nutritious
 Easy Homemade Garlic Bread from Scratch with All-Purpose Flour
 Best Garlic Bread Recipe from Scratch: Step by Step Guide
 Leavened vs Unleavened Bread: Complete Guide | Differences & Example
 Ultimate Double Chocolate Sourdough Bread Recipe
 Double Chocolate Espresso Sourdough Bread Recipe: Step by Step Guide
 Step by Step 7 Brew Banana Bread Blondie Recipe
 Cookie Dough Banana Bread: The Ultimate Bakery-Style Recipe
 Martha Stewart Sour Cream Banana Bread (Ultra-Moist Recipe)
 Martha Stewart Buttermilk Banana Bread Recipe (No Sour Cream Needed)
 Martha Stewart Chocolate Chip Banana Bread (Gooey & Perfect)
 Martha Stewart Banana Nut Bread (Crunchy Walnuts, Perfect Texture)
 Edible Cookie Dough Recipe (Safe, Easy & 10+ Variations)
