Quick Summary: Ezekiel bread is an ancient, nutrient-dense bread made from sprouted whole grains and legumes that creates a complete protein. This recipe shows you exactly how to sprout grains, mix the dough, and bake authentic Ezekiel bread at home. Most home bakers can complete this in about 6 days total (mainly sprouting time) with just 2-3 hours of active work.
What Is Ezekiel Bread? Understanding This Ancient Recipe
Ezekiel bread gets its name from the biblical book of Ezekiel, where a specific grain mixture is mentioned. Unlike regular white or whole wheat bread you find in stores, this bread uses sprouted grains—grains that have started to grow but haven’t become full plants yet. Sprouting is the key to what makes this bread special.
When you sprout grains and legumes, you unlock nutrients that were locked inside the hard grain shell. Your body can absorb more vitamins, minerals, and protein from sprouted grains compared to regular grains. Many home bakers love Ezekiel bread because it tastes great and keeps them feeling full longer. If you want to understand why sprouting matters so much, think of it this way: sprouting begins the process of breaking down starches into simpler sugars and reduces compounds called phytic acid that normally stop your body from absorbing nutrients.
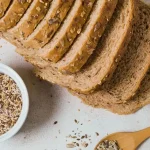
The basic Ezekiel bread formula mixes six key ingredients: wheat, spelt, barley, millet, lentils, and soybeans. Each grain and legume brings its own flavor and nutrition. When you combine them, you get all nine essential amino acids—the building blocks your body needs to build muscle and stay healthy. That is why many people call Ezekiel bread a complete protein bread.
Related Recipe: Easy Homemade Whole Wheat Bread Recipe
Why Should You Make Ezekiel Bread at Home?
Save Money: Buying store-bought sprouted Ezekiel bread costs $4 to $7 per loaf. Making it at home costs around $1.50 to $2 per loaf because you buy grains and legumes in bulk.
Control Your Ingredients: When you make bread at home, you know exactly what goes into it. No added sugars, no preservatives, no mystery ingredients. Just real food.
Better Digestibility: Homemade Ezekiel bread made with truly sprouted grains is easier on your stomach than regular bread. The sprouting process breaks down the grain structure, making nutrients more available and reducing digestive stress.
Full Nutritional Benefits: Store-bought sprouted bread may sit on shelves for weeks. Homemade Ezekiel bread keeps more of its enzyme and nutrient content. Many people who are sensitive to bread find that homemade sprouted Ezekiel bread feels gentler on their system.
The Health Advantage: A single slice of homemade Ezekiel bread typically contains 8-10 grams of protein and 4-5 grams of fiber. Compare that to regular whole wheat bread (about 3-4 grams of protein), and you see the difference.
Related Recipe: Honey Wheat Bread Recipe
Complete Ingredients List
For Sprouting (5-6 Days Before Baking)
- 1 cup hard red wheat berries
- ½ cup spelt berries
- ½ cup barley (hulled)
- ½ cup millet
- ½ cup dried lentils
- ½ cup soybeans (or additional lentils if you cannot find soybeans)
For the Dough (Baking Day)
- 1½ cups warm water
- ¼ cup raw honey or maple syrup
- ¼ cup olive oil or coconut oil
- 1 tablespoon sea salt
- 1 large egg (or flax egg for vegan version)
- 1 tablespoon lecithin (optional but recommended for moisture)
- 2 tablespoons active dry yeast (or instant yeast)
- 3-4 tablespoons sesame seeds (optional topping)
Related Recipe: BEST Whole Wheat Bread Machine Recipe
How to Make Ezekiel Bread: Complete Step-by-Step Instructions
Part 1: Sprouting Your Grains (Days 1-5)
Step 1: Soak Your Grains and Legumes. Measure out all the grains and legumes listed above. Place each type into its own small glass jar or bowl. Some people mix them, but keeping them separate gives you more control and ensures even sprouting. Cover each jar with a piece of cheesecloth held with a rubber band, or use a sprouting jar with a screen lid. Fill each jar with filtered water until the grains and beans are covered by about 2 inches of water. Let them soak at room temperature (around 68-72°F) for 8-12 hours.
Step 2: First Rinse and Drain. After soaking, drain off all the water using your cheesecloth or screen. Rinse the grains thoroughly under cool, running water. Shake off any excess water. You want the grains moist but not soaking. Place each jar at a slight angle (you can prop it with a bottle or use a sprouting jar stand) so any extra water drains away. Leave at room temperature.
Step 3: Daily Rinse Routine (Days 2-4) Every morning and evening for the next 3-4 days, repeat the rinse and drain process. Add cool water, swish gently, and drain it away. This prevents mold and keeps your sprouts clean. After each rinse, return the jars to their tilted position.
Step 4: Watch for Sprouting By day 3 or 4, you should see tiny white tails (root shoots) appearing on most of the grains and beans. The barley may sprout first because it has no hull. Do not wait for all of them to have long sprouts—small tails are all you need. This usually happens by day 5.
Step 5: Dry Your Sprouts Slightly. After your final rinse on day 5, drain the sprouts very well. Spread them out on a clean dish towel for 1-2 hours so they lose some surface moisture. They should feel damp but not wet.
Related Recipe: Yummy Whole Wheat Sourdough Bread
Part 2: Grinding and Mixing the Dough (Baking Day, Day 5)
Step 6: Grind Your Sprouted Grains Using a grain mill, coffee grinder (working in batches), or food processor, grind all your sprouted grains and legumes into a flour-like texture. You want a fine consistency, similar to regular whole wheat flour. Some people end up with flakes rather than fine flour—that is fine. This should give you about 4-5 cups of ground sprouted grain flour.
Step 7: Mix Wet Ingredients. In a large mixing bowl, combine the warm water (not hot—around 110°F), honey, oil, salt, egg, and lecithin. Whisk this mixture well until the honey dissolves and everything is combined.
Step 8: Add Yeast Sprinkle the dry yeast over the wet mixture and stir it in. Let this sit for 5 minutes so the yeast activates. You should see some bubbles forming.
Step 9: Add the Ground Grain. Add your ground sprouted grain flour to the wet mixture, stirring well. The dough will be thick and slightly sticky, more like thick cake batter than traditional bread dough. This is normal and expected. Keep mixing until all the flour is incorporated and you have a uniform dough. Do not knead it like you would regular bread dough.
Step 10: First Rise Transfer the dough to an oiled bowl, cover it with a damp towel or plastic wrap, and let it rise in a warm place for 45 minutes to 1 hour. The dough will not rise as much as regular bread dough because there is less gluten development. It might only grow about 50% in volume. That is normal.
Related Guide: Homemade Garlic Bread from Scratch with All-Purpose Flour
Part 3: Shaping, Rising, and Baking (Day 6)
Step 11: Prepare Your Bread Pans. Oil two 9×5-inch loaf pans very well, or use parchment paper. Ezekiel bread dough sticks easily, so do not skip this step.
Step 12: Shape and Pan the Dough. Transfer the dough to a flat surface. It will be soft and slightly sticky. Divide it into two equal portions. Shape each portion into a ball, then gently press and stretch it to fit your loaf pan. Do not worry about making it perfect—this dough is forgiving. Place each shaped dough into a prepared pan.
Step 13: Second Rise Cover the pans with a damp towel and let them rise for 30-45 minutes in a warm place. The dough should rise to about ½ inch above the rim of the pan.
Step 14: Preheat Your Oven About 15 minutes before baking, preheat your oven to 350°F. Ezekiel bread bakes at a lower temperature than regular bread because the grains and legumes are dense and need more time to cook through.
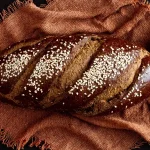
Step 15: Add Toppings (Optional) If you want sesame seeds on top, lightly spray the dough with water and press sesame seeds onto the surface.
Step 16: Bake Place the loaves in your preheated 350°F oven and bake for 45-50 minutes. The bread should be golden brown and sound hollow when you tap the bottom. If the top browns too quickly, loosely cover it with foil after 30 minutes.
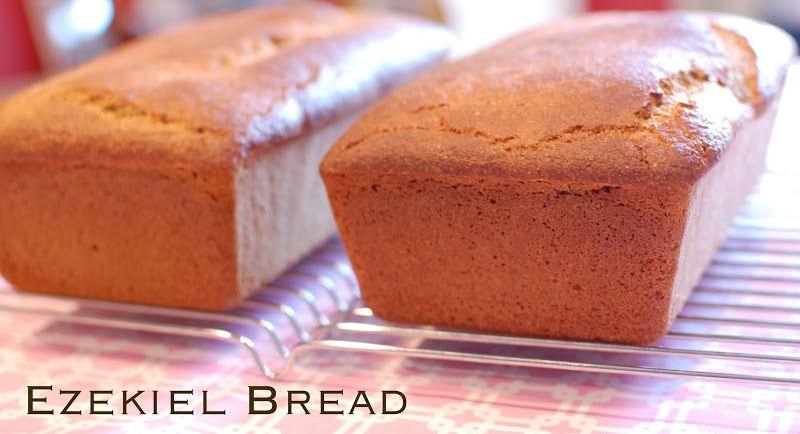
Step 17: Cool. Remove the bread from the pans and place it on a wire rack to cool completely. This takes about 1-2 hours. Do not slice the bread while it is still warm—it is still cooking and will fall apart. Wait until it cools.
Related Guide: Garlic Bread Recipe from Scratch
Expert Tips for Baking Ezekiel Bread Successfully
Why Your Bread Might Be Dense: Ezekiel bread will never be as light and airy as regular white bread. It is supposed to be dense and hearty. This is normal and means you did it right. If your loaf is extremely dense (like a brick), you may have ground your grains too fine or packed the dough too much when shaping.
Creating a Better Crust: If you want a crispier crust, place a pan of boiling water on the bottom shelf of your oven while baking. The steam helps develop a thicker, crunchier crust.
Temperature Control: Sprouted dough rises more slowly than regular dough because there is less gluten. Keep your dough in a warm spot (around 75-80°F) for best results. A turned-off oven with the light on works great.
Testing for Doneness: Tap the bottom of the baked loaf. If it sounds hollow, it is done. If it sounds solid or dull, bake for another 5 minutes and check again.
Preventing Mold During Sprouting: Make sure you drain your grains completely after each rinse. Excess water causes mold. If you see any fuzzy growth during sprouting, throw that batch out and start over.
Yeast Alternatives: If you do not have instant yeast, you can use active dry yeast (same amount) or even a sourdough starter (½ cup, omit the dry yeast). Sourdough starter will take 8-12 hours for the rise instead of 45 minutes.
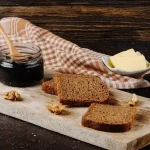
Storage, Freezing, and Reheating
Room Temperature Storage (2-3 Days): Place your cooled Ezekiel bread in a breadbox or paper bag at room temperature. Do not use plastic—it traps moisture and encourages mold. Ezekiel bread keeps better in cool air than humid air.
Refrigerator Storage (Up to 1 Week): Store your bread in an airtight container or plastic bag in the fridge. It lasts longer cold, but it will dry out over time.
Freezing for Long-Term Storage (Up to 3 Months): Slice your bread, wrap it tightly in plastic wrap, place it in a freezer bag, and freeze. You can toast frozen slices directly in the toaster without thawing.
Reheating: Toast frozen or refrigerated slices in the toaster until warm and crispy. You can also wrap the slice in foil and warm it in a 300°F oven for 5-10 minutes.
Baking Ezekiel Bread: A Rewarding Kitchen Project
Making Ezekiel bread at home is not difficult—it just takes patience. Most of the work happens passively while your grains sprout and your dough rises. The active work (mixing, grinding, shaping) takes only 30-45 minutes spread across two days.
Once you bite into a slice of warm, fresh Ezekiel bread, you will understand why people make this at home. The taste is richer and more complex than store-bought bread. The texture is hearty and satisfying. Best of all, you know you are eating real food packed with complete protein, fiber, and nutrients your body actually uses.
Start with one batch. See how it turns out. Then make it again. After two or three loaves, you will have the rhythm down and it becomes second nature. This is bread baking at its most rewarding.
Nutrition Information (Per Slice, Approximately)
| Nutrient | Amount |
|---|---|
| Calories | 120-140 |
| Protein | 8-10g |
| Fiber | 4-5g |
| Carbohydrates | 20-22g |
| Fat | 2-3g |
| Sodium | 280mg |
| Calcium | 40-50mg |
| Iron | 2-3mg |
Frequently Asked Questions
Can I make Ezekiel bread in a bread machine?
Yes! Add all your wet ingredients to the bread machine first, then add the ground sprouted grain flour. Select the dough cycle (not the full bread cycle). Once the dough cycle ends, remove the dough, shape it into two loaves, and bake in the oven as described in steps 12-17. This saves approximately 1 hour of work while maintaining the same quality.
How long does the sprouting process actually take?
Most grains and legumes begin sprouting within 24 hours. Visible sprouts (tiny white tails) usually appear by day 3-4. You can bake once you see small sprouts—you do not need long sprouts. Total sprouting time is typically 5-6 days from start to finish.
Can I skip the sprouting step and just use regular whole-grain flour?
You can, but it is not true Ezekiel bread. Unsprouted flour will give you a denser, heavier loaf that is not as nutritious. Sprouting is what makes this bread special and what makes it easier to digest. However, if you are in a hurry, soaking your grains in water for 12-24 hours instead of sprouting gives you some nutritional benefit.
What should I do if my dough will not rise?
Check your yeast expiration date first—old yeast is the most common cause. Make sure your yeast was activated in warm (not hot) water. If your kitchen is cold, move your dough to a warmer spot. Finally, Ezekiel dough rises much more slowly than regular bread, so give it the full 45 minutes to 1 hour for the first rise.
Is Ezekiel bread gluten-free?
No. Most Ezekiel bread recipes include wheat, spelt, and barley, all of which contain gluten. However, some people with mild gluten sensitivity find sprouted grain bread easier to digest. If you need gluten-free bread, you cannot make traditional Ezekiel bread. Consider trying a gluten-free sourdough instead.
How much protein is in one slice?
A typical slice of homemade Ezekiel bread contains 8-10 grams of protein, making it one of the highest-protein bread options available. Store-bought versions vary, so check the label.
Why does store-bought sprouted bread taste different from homemade?
Store-bought sprouted Ezekiel bread is pasteurized and may sit on shelves for weeks. Homemade Ezekiel bread is fresher and retains more of the subtle grain flavors. It also has a denser, chewier texture.
What if I only want to make one loaf instead of two?
Cut all ingredient amounts in half. One loaf bakes for about 40-45 minutes instead of 50.
Note: Values vary based on specific grains used, sprouting time, and pan size. For exact nutrition, use a food calculator or consult a nutritionist.
Related Recipes:
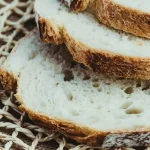
 Easy Homemade Whole Wheat Bread Recipe – Soft & Yummy Made at Home
 Easy Honey Wheat Bread Recipe: The Best Homemade Bread for Kids
 The BEST Whole Wheat Bread Machine Recipe (Super Easy!)
 How to Make Yummy Whole Wheat Sourdough Bread (It’s Easier Than You Think!)
 Soft and Yummy Whole Wheat Sandwich Bread Recipe (Must Try!)
 Easy Authentic Rougamo Bread Recipe: The Crispy Chinese Flatbread 2025 Recipe
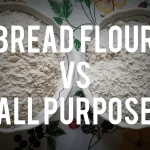 Bread Flour vs All-Purpose Flour: What’s the Difference?
 King Arthur Gluten-Free Sourdough Bread Recipe
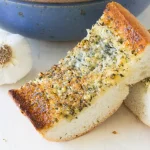 Easy Homemade Garlic Bread from Scratch with All-Purpose Flour
 Best Garlic Bread Recipe from Scratch: Step by Step Guide
 Leavened vs Unleavened Bread: Complete Guide | Differences & Example
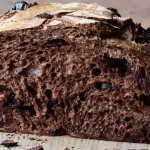 Ultimate Double Chocolate Sourdough Bread Recipe
 Double Chocolate Espresso Sourdough Bread Recipe: Step by Step Guide
 Step by Step 7 Brew Banana Bread Blondie Recipe
 Cookie Dough Banana Bread: The Ultimate Bakery-Style Recipe
 Martha Stewart Banana Bread Recipe (The Best You’ll Ever Make)
 Martha Stewart Sour Cream Banana Bread (Ultra-Moist Recipe)
 Martha Stewart Buttermilk Banana Bread Recipe (No Sour Cream Needed)
 Martha Stewart Chocolate Chip Banana Bread (Gooey & Perfect)
 Martha Stewart Banana Nut Bread (Crunchy Walnuts, Perfect Texture)
 Edible Cookie Dough Recipe (Safe, Easy & 10+ Variations)